
Annotating Photos with the Image Editor
The SuperClear AI Image Editor is a full drawing tool layered on top of your inspection photos. Use it to mark up AI detections, draw arrows at specific defects, add text labels, or outline areas for your reports. This article covers every tool, the keyboard shortcuts, and the options that surround them — color, stroke size, zoom, undo/redo, and visibility filtering.
Opening the Image Editor
Section titled “Opening the Image Editor”- Open any inspection and go to the photo grid
- Tap or click a photo to open the photo detail view
- Click the Edit (pencil) button on the image
- The Image Editor opens full-screen with your photo as the canvas
When the editor opens, SuperClear AI’s existing detections appear as pre-drawn boxes in the color assigned to each condition. You can edit, move, resize, or delete them like any other annotation.
The Seven Drawing Tools
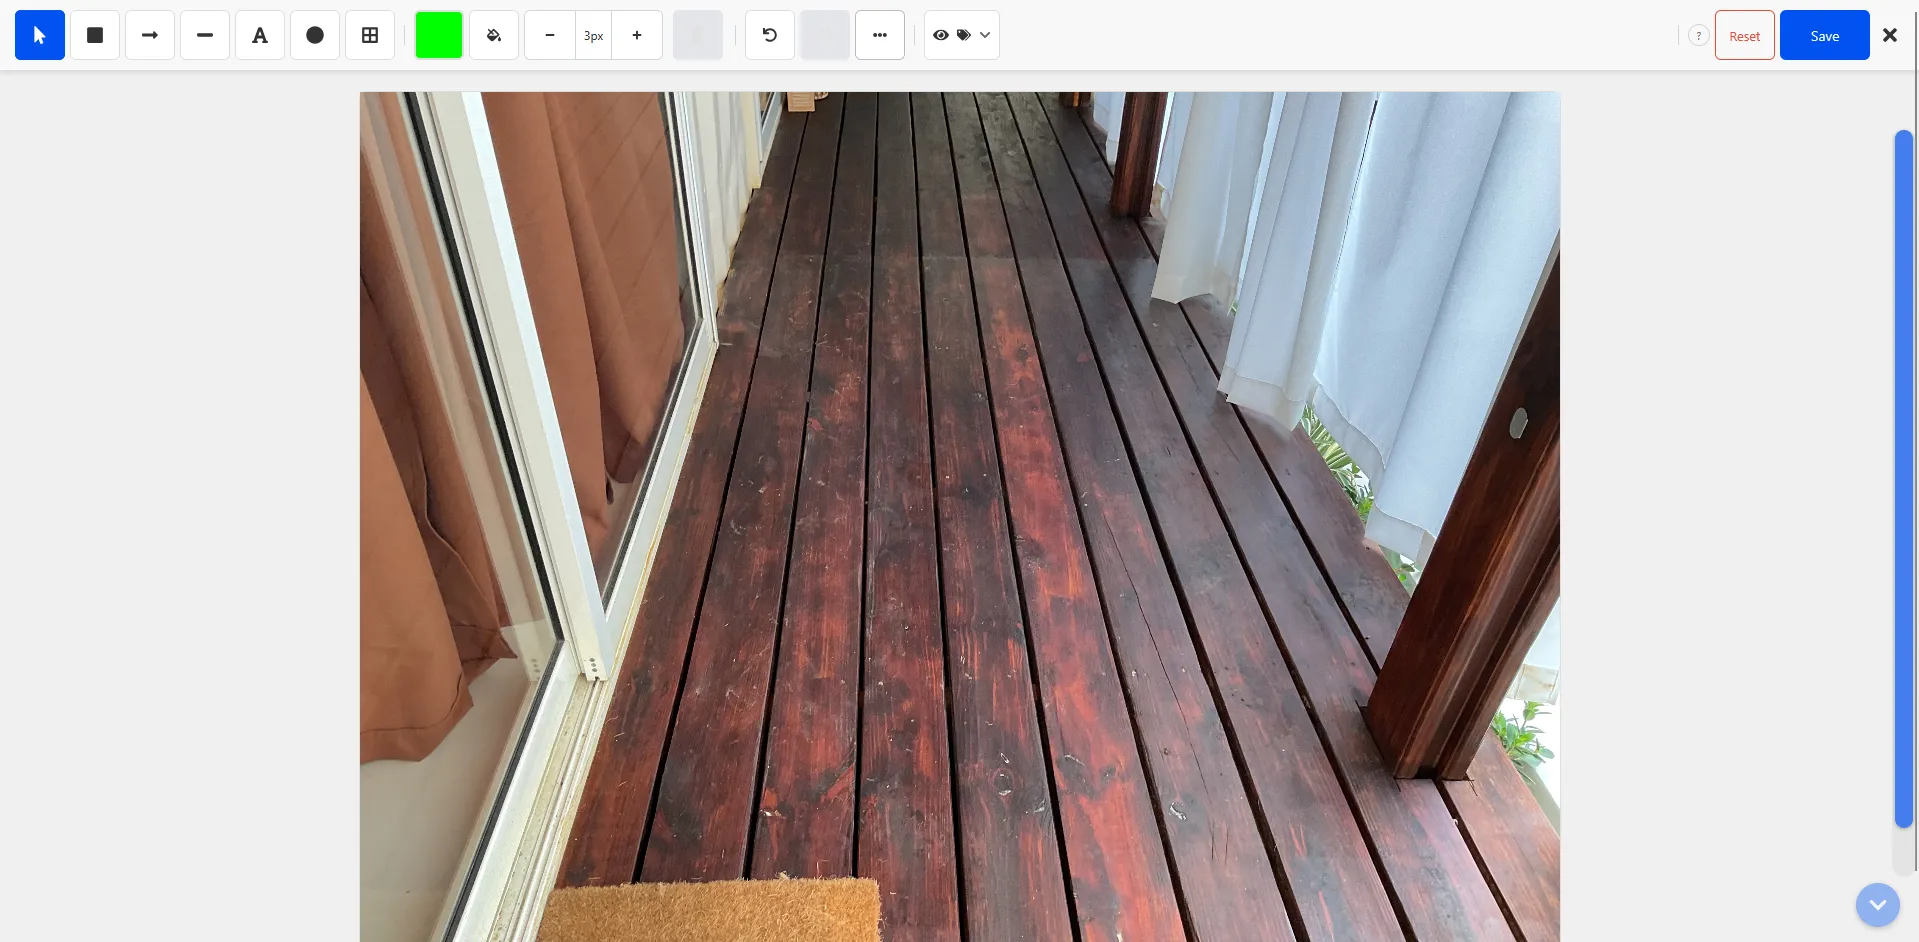
Section titled “The Seven Drawing Tools”The toolbar across the top has seven tools. Click a tool to activate it, then click-and-drag on the canvas to draw. Each tool has a one-key shortcut shown below.
| Tool | Shortcut | Use |
|---|---|---|
| Select | V | Click an annotation to select it. Drag to move. Resize with corner handles. |
| Box | B | Rectangular frame. Used by AI detections and for marking defect areas. |
| Arrow | A | Straight line with a head. Point at a specific feature. |
| Line | L | Straight line with no head. Underline or measure. |
| Text | T | Add a text label. Click, type, then click elsewhere to commit. |
| Ellipse | E | Oval or circle. Useful for curved defects or rounded features. |
| Border | O | Frame around the entire image — useful for report framing. |
Color and Stroke Size
Section titled “Color and Stroke Size”Two controls in the toolbar affect every new annotation you draw:
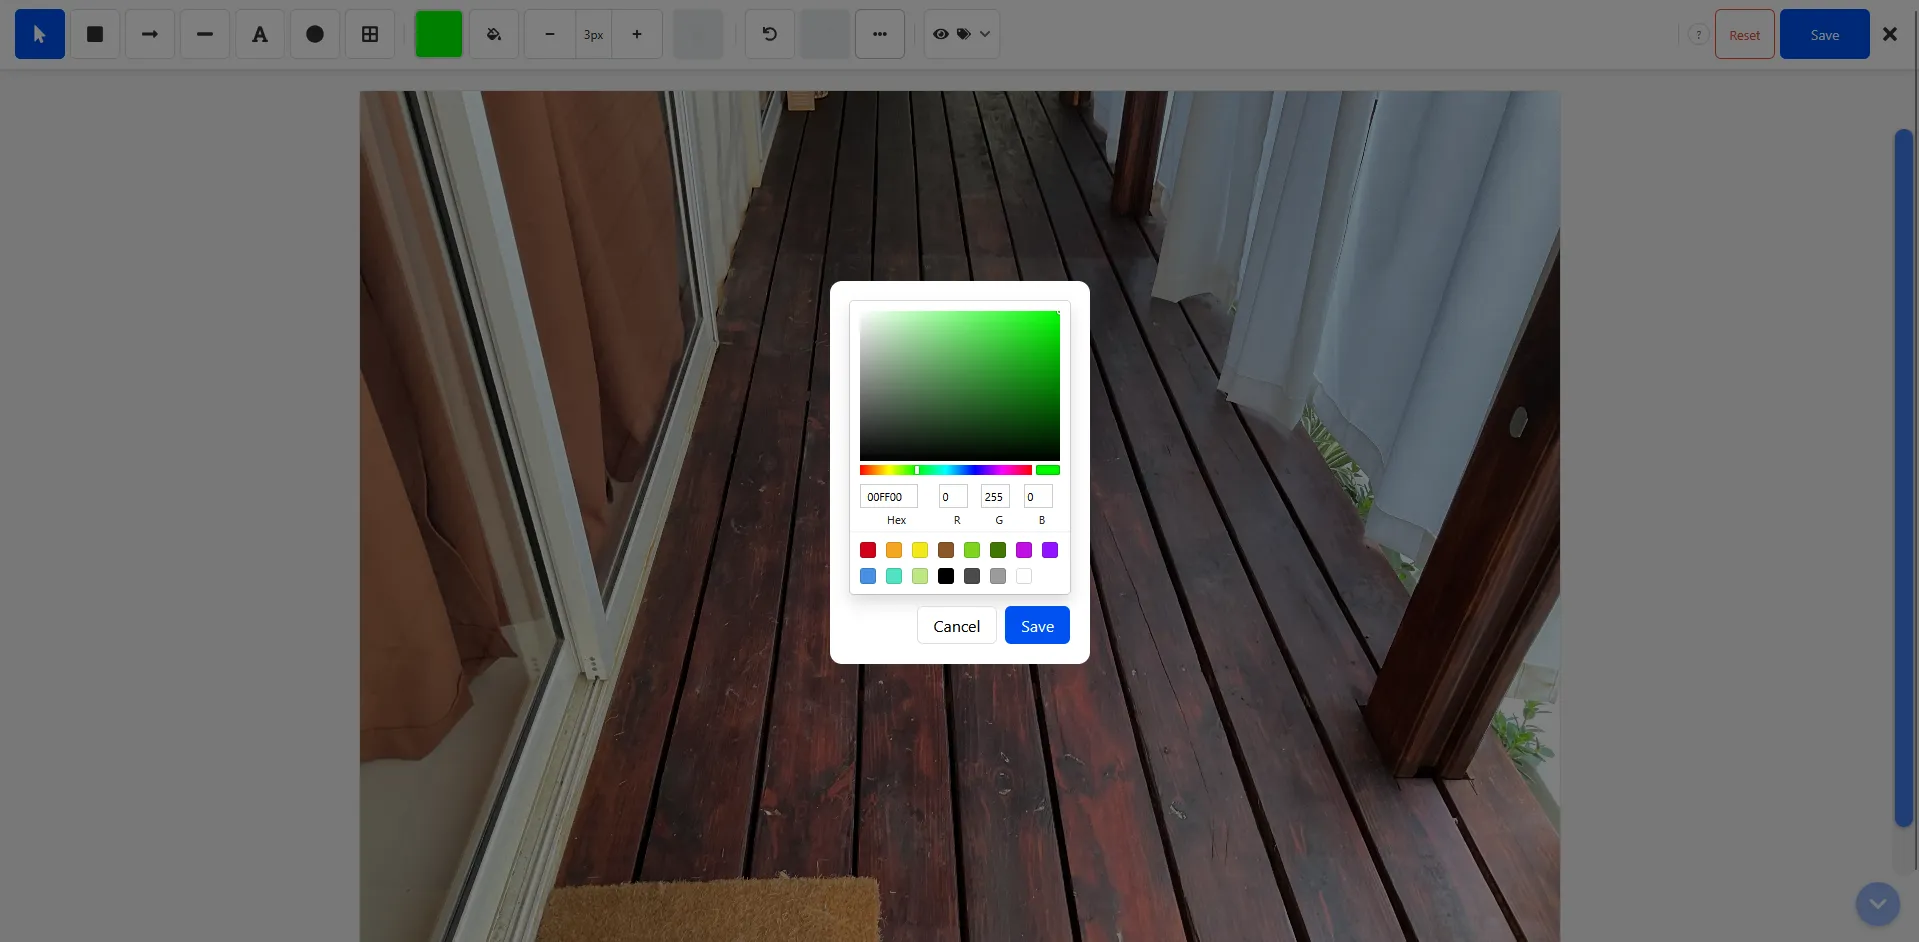
- Color picker — Click the color swatch to open a full color picker (hue wheel, hex input, preset swatches). The chosen color applies to the next annotation you draw.
- Stroke size slider — Sets line thickness between 1 and 30 pixels. Thicker strokes show up better in zoomed-out reports; thinner strokes are cleaner up close.
To change the color or size of an existing annotation, switch to the Select tool, click the annotation, then adjust the controls. The change applies to the selected shape.
Zoom and Pan
Section titled “Zoom and Pan”- Zoom in / out — Use the zoom buttons in the toolbar or the mouse wheel. Zoom range is 0.5x to 3.0x.
- Pan — When zoomed in, switch to the Select tool (no shape selected) and drag the canvas to pan. The cursor changes to a grab hand.
- Reset zoom — The zoom control returns to 1.0x with a single click.
Undo, Redo, and History
Section titled “Undo, Redo, and History”Every action — draw, move, resize, delete, recolor — is tracked in history. Continuous actions like dragging are collapsed into a single history entry so you can undo a drag in one step rather than dozens.
| Action | Windows / Linux | Mac |
|---|---|---|
| Undo | Ctrl + Z | ⌘ + Z |
| Redo | Ctrl + Shift + Z | ⌘ + ⇧ + Z |
Undo and Redo buttons are also in the toolbar. The Redo button is grayed out when there’s nothing to redo; the Undo button is grayed out when you’re at the start of history.
Visibility Filter
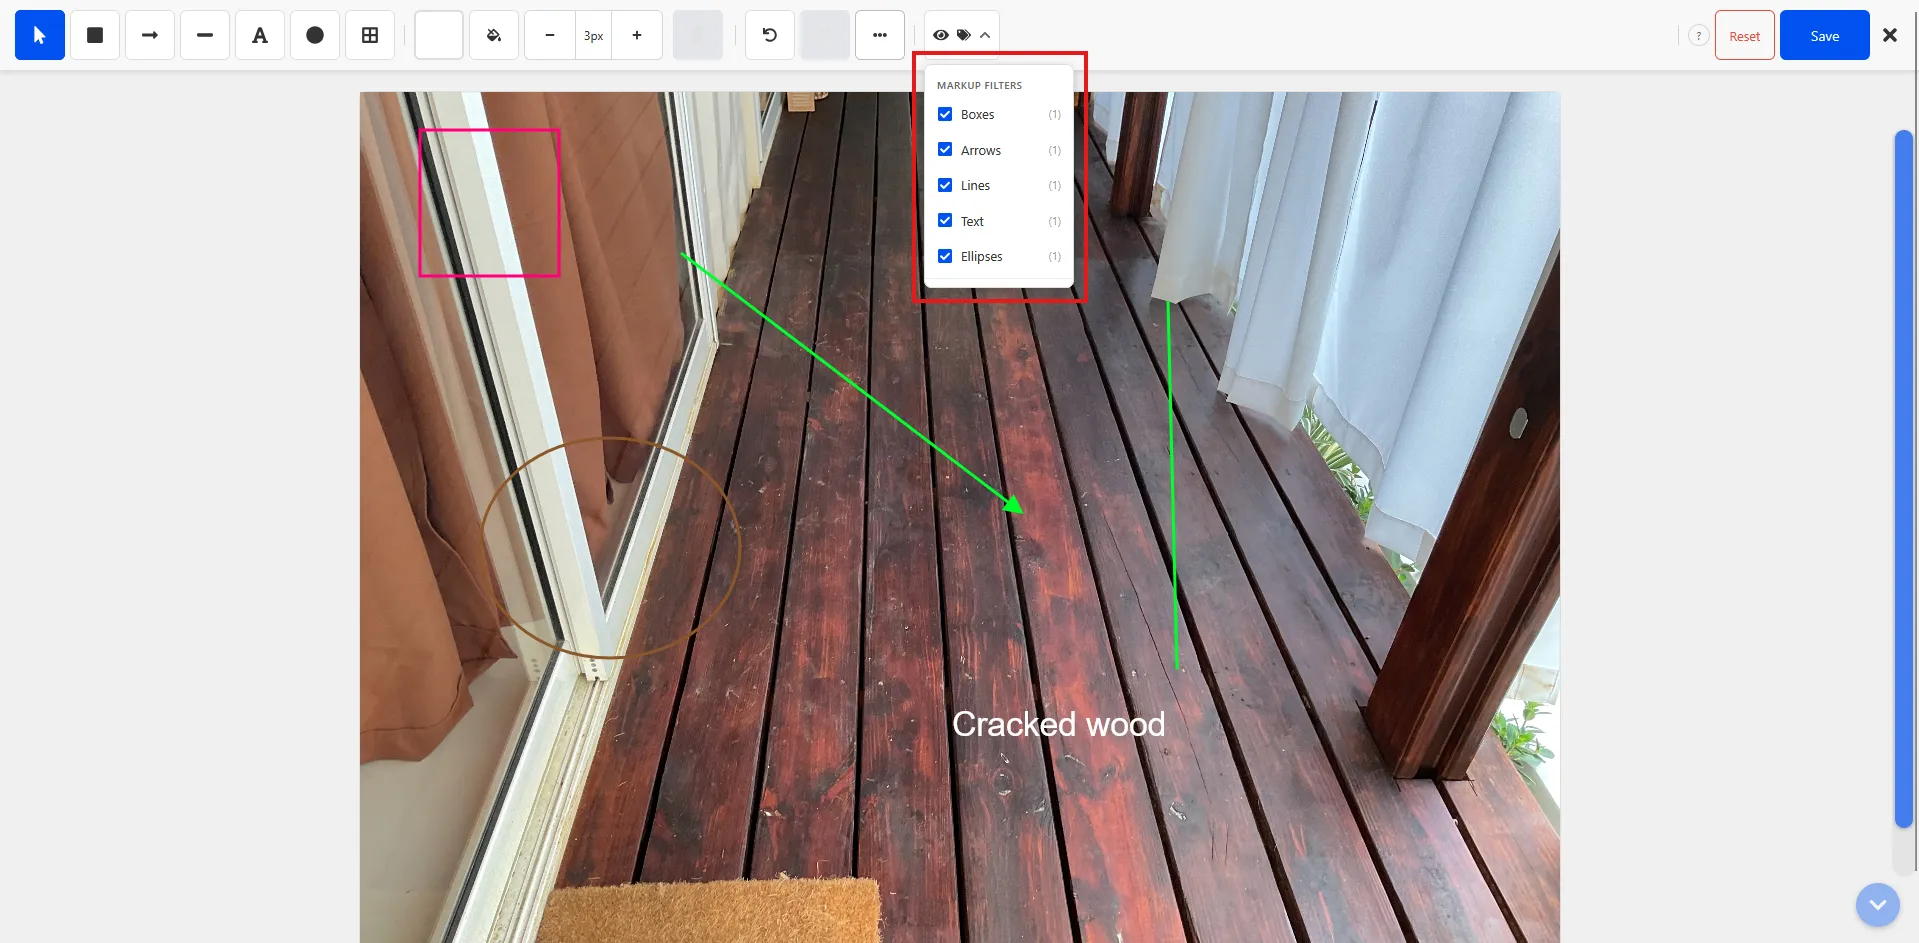
Section titled “Visibility Filter”When a photo has many annotations — especially auto-generated AI detections — you can temporarily hide some types without deleting them. Click the visibility dropdown in the toolbar and uncheck any shape type you want to hide (Box, Arrow, Line, Text, Ellipse, Border). Hidden annotations are still saved; they just don’t render on the canvas while the filter is active.
Selecting and Editing Existing Annotations
Section titled “Selecting and Editing Existing Annotations”- Press V or click the Select tool
- Click the annotation you want to edit — a dashed outline and corner handles appear
- Drag the shape to move it
- Drag a corner handle to resize
- Change color, stroke size, or delete via the toolbar while the shape is selected
- Press Delete or Backspace to remove it
Adding Text Labels
Section titled “Adding Text Labels”- Press T or click the Text tool
- Click where you want the label to appear
- A text box opens — type your label
- Click anywhere outside the text box to commit
- With Select, click the text to move or resize the font
Text inherits the current color selection. To change font size, use the stroke slider — it maps to text size for Text annotations.
Saving and Discarding
Section titled “Saving and Discarding”- Save — Writes every annotation to the photo. The edited photo replaces the original in the inspection and is used in reports.
- Reset — Reverts to the original photo, discarding every annotation you’ve added in this session. This can’t be undone.
- Close (X) — Closes without saving if nothing has changed. If you have unsaved changes, you’ll be prompted to confirm.
Keyboard Shortcut Reference
Section titled “Keyboard Shortcut Reference”| Shortcut | Action |
|---|---|
| V | Select tool |
| B | Box tool |
| A | Arrow tool |
| L | Line tool |
| T | Text tool |
| E | Ellipse tool |
| O | Border tool |
| Ctrl + Z / ⌘ + Z | Undo |
| Ctrl + Shift + Z / ⌘ + ⇧ + Z | Redo |
| Delete / Backspace | Delete selected annotation |
Letter shortcuts don’t fire when you’re typing in a text annotation or when a modifier key is held — so they won’t interfere with normal editing.
Best Practices
Section titled “Best Practices”- Keep it minimal. A single arrow and a label usually beats a densely annotated photo. Reports look cleaner.
- Match colors to your team’s conventions. Reuse the same color for the same condition type across photos so viewers can skim.
- Don’t obscure evidence. Draw around defects, not on top of them — the photo still needs to show the underlying issue.
- Use Select first. Before drawing, hit V to make sure you don’t accidentally draw a new shape when you meant to move one.
Troubleshooting
Section titled “Troubleshooting”Keyboard shortcuts aren’t working
Section titled “Keyboard shortcuts aren’t working”Solutions:
- Click on the canvas once to make sure the editor has keyboard focus
- If a text annotation is active, letter shortcuts are disabled until you commit the text
I can’t click to select my annotation
Section titled “I can’t click to select my annotation”Solutions:
- Make sure you’re on the Select tool (V)
- If the visibility filter has the shape type hidden, the annotation is invisible and un-clickable. Re-check the shape type in the visibility dropdown.
I hit Reset and lost my work
Section titled “I hit Reset and lost my work”Solutions:
- Reset is immediate and can’t be undone. If you haven’t closed the editor yet, try Ctrl+Z / ⌘+Z — some resets are recoverable through history.
- Always Save before trying Reset if you want to preserve a partial edit.