
Managing Photo Tags and Conditions
Photo tags (also called “conditions”) are how you organize SuperClear AI photos by defect type. Each tag represents a specific WRB issue category — for example, “Tape Failure”, “Missing Fastener”, or “Cut in Membrane”. This article explains how tags work, how to assign them to photos, and how to customize the colors that mark each condition on your inspection annotations.
Why Tag Photos?
Section titled “Why Tag Photos?”- Organize the photo grid — Use Group by Conditions to see all photos with the same defect together
- Filter for review — Quickly focus on a single condition while reviewing
- Color-coded annotations — Each tag can have its own color so you can recognize defect types at a glance
- Punch list grouping — Tagged photos appear grouped by condition in the generated PDF
How Tags Are Organized
Section titled “How Tags Are Organized”Photo tags come from your tenant’s tag library — your administrator defines them. Tags use a parent-child structure so related conditions can be grouped:
- Parent tags — Top-level condition categories (for example, “WRB Issues”)
- Child tags — Specific sub-conditions inside a parent (for example, “Cut in WRB” or “Loose Tape”)
When you assign tags to photos, you usually pick parent tags. The child relationship is mostly used for organizing the tag library itself.
AI-Assigned Tags
Section titled “AI-Assigned Tags”When the AI processes a photo, it can automatically assign condition tags based on what it detects. The first AI step on each photo is “Condition assignment”, which classifies the WRB defect category before the second step (defect detection) marks the specific bounding boxes.
You can override or supplement AI-assigned tags by manually editing the photo.
Assigning Tags Manually
Section titled “Assigning Tags Manually”- Open the SuperClear AI Screen for your inspection
- Click on a photo to enter edit mode
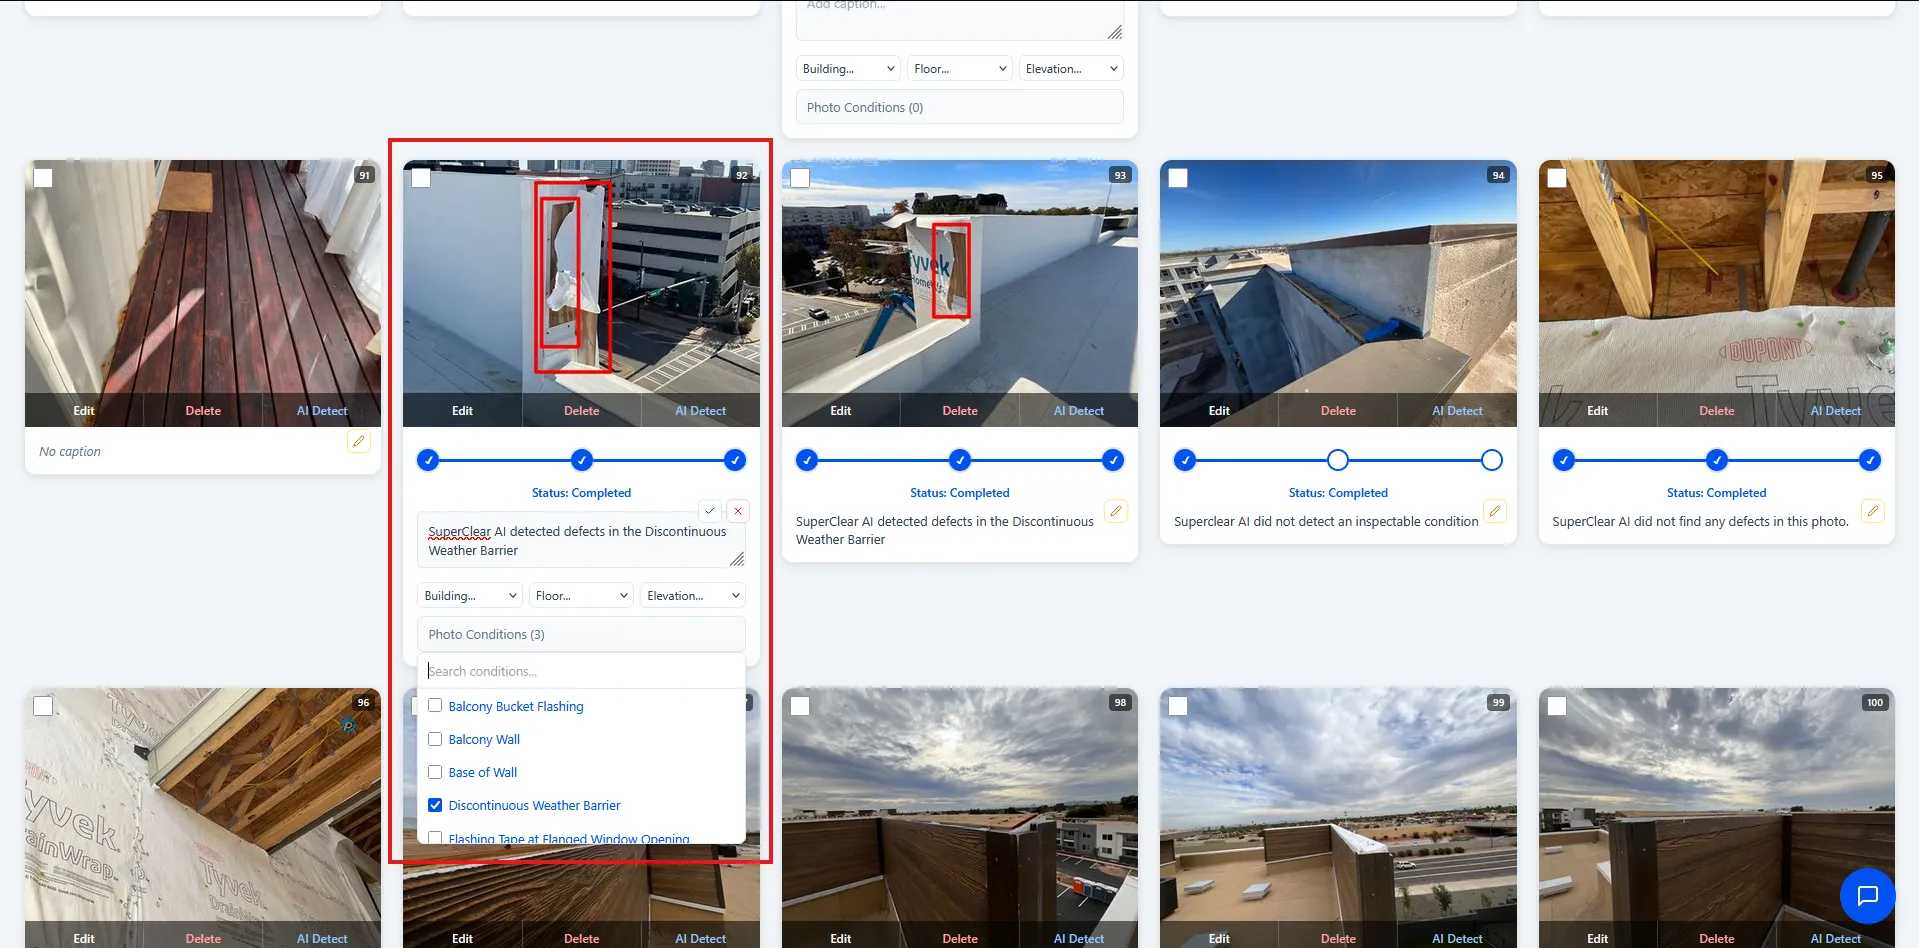
- Click the Photo Conditions ([X]) button below the image (the number shows how many tags are currently assigned)
- A dropdown opens with a search field and a list of available tags
- Type in the search field to filter the list
- Check the boxes next to the tags you want to assign
- Click outside the dropdown to close it
- Click the green checkmark to save
Removing Tags
Section titled “Removing Tags”In the Photo Conditions dropdown, uncheck any tag you want to remove. Save the photo when done.
Filtering Photos by Tag
Section titled “Filtering Photos by Tag”- On the SuperClear AI Screen, expand the Filters panel
- Open the Filter by dropdown
- Check the conditions you want to focus on (you can select multiple)
- The photo grid updates to show only photos with those tags
- Click Reset to clear the filter
Grouping Photos by Tag
Section titled “Grouping Photos by Tag”- On the SuperClear AI Screen, expand the Filters panel
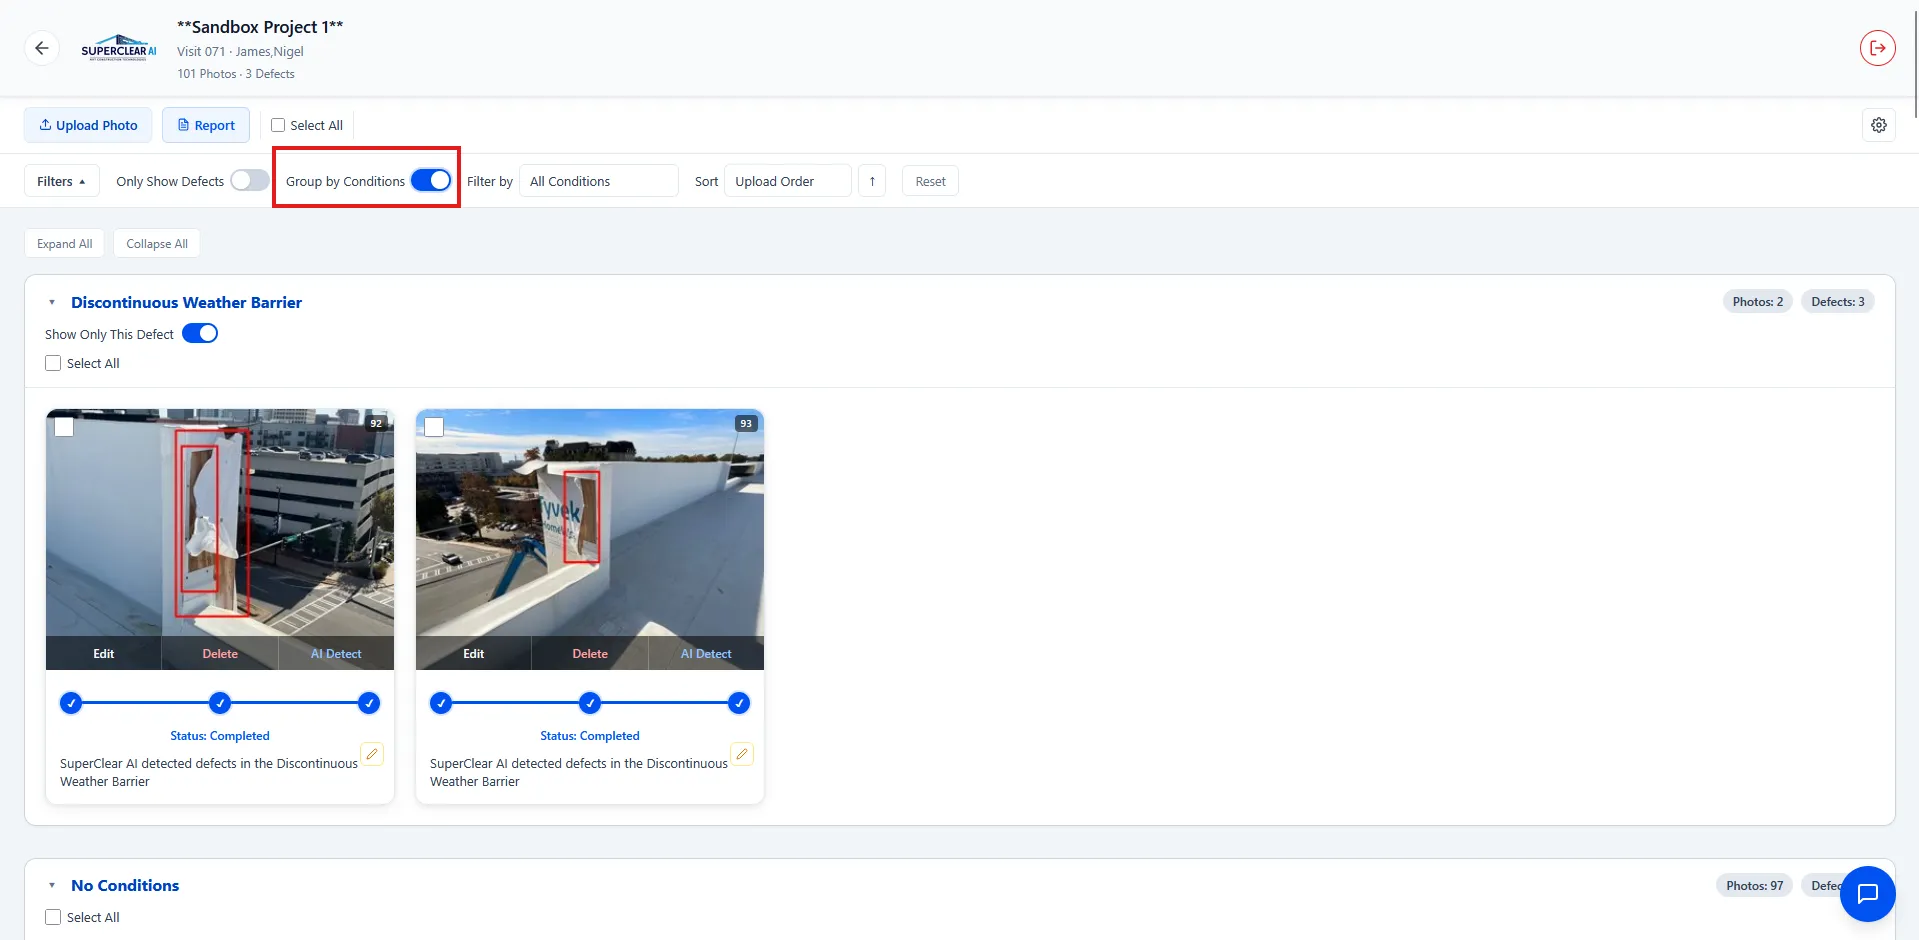
- Toggle Group by Conditions on
- The photo grid reorganizes into collapsible sections, one per condition
- Each section shows the condition name, photo count, and a Select All in Group checkbox
- You can expand or collapse individual sections, or use Expand All / Collapse All in the toolbar
Customizing Condition Colors
Section titled “Customizing Condition Colors”Each condition can have its own color, which determines how its bounding boxes and markup render on every photo in the inspection. You set colors (and the confidence threshold that filters detections) in the Photo Settings modal — see Photo Settings — Confidence Threshold and Condition Colors for the full walkthrough, strategy tips, and troubleshooting.
Per-Tag Annotation Images
Section titled “Per-Tag Annotation Images”When SuperClear AI processes a photo with multiple defects, it generates separate annotation overlays for each tag. In Group by Conditions view, you’ll see the tag-specific markup on each photo — not the full set of all annotations. This makes it much easier to focus on one defect type at a time.
Best Practices
Section titled “Best Practices”- Use consistent terminology with your team. If everyone tags photos the same way, the punch list is much more useful.
- Tag photos as you review them. Don’t wait until the end — tag as you go and the work spreads out
- Pick distinct colors for the conditions you use most. Bright, contrasting colors are easier to spot in the photo grid
- Don’t over-tag. If a photo only shows one defect, give it one tag. Multiple tags should reflect multiple distinct conditions in the same photo.
- Use the search field in the tag dropdown when your tag library is large — typing a few letters filters fast
Troubleshooting
Section titled “Troubleshooting”The Photo Conditions dropdown is empty
Section titled “The Photo Conditions dropdown is empty”Solutions:
- Your tenant doesn’t have any tags configured. Ask your administrator to add condition tags to the tag library.
My tag selection isn’t saving
Section titled “My tag selection isn’t saving”Solutions:
- Make sure you clicked the green checkmark to save the photo edits
- If you’re offline, the change can’t sync until you reconnect
- Refresh the page and try again
I changed a condition color but the bounding boxes are still red
Section titled “I changed a condition color but the bounding boxes are still red”Solutions:
- Make sure you saved the Photo Settings modal after changing the color
- Refresh the SuperClear AI Screen — colors are applied when photos are rendered
- Check that the color was applied to the right condition (not a similarly-named one)
Grouped view shows empty groups
Section titled “Grouped view shows empty groups”Solutions:
- Photos without any tag don’t appear in grouped view. Tag them first or switch to flat grid view.