
Photo Settings — Confidence Threshold and Condition Colors
The Photo Settings modal gives you two controls that shape every AI detection you see on an inspection: the Confidence Threshold (how confident the model must be before a detection is shown) and Condition Colors (what color each tag renders in on the photo). Both settings are saved per inspection, so you can tune them to the site without affecting other jobs.
Opening Photo Settings
Section titled “Opening Photo Settings”- Open an inspection in SuperClear AI
- Click the Photo Settings (gear) icon near the filter panel
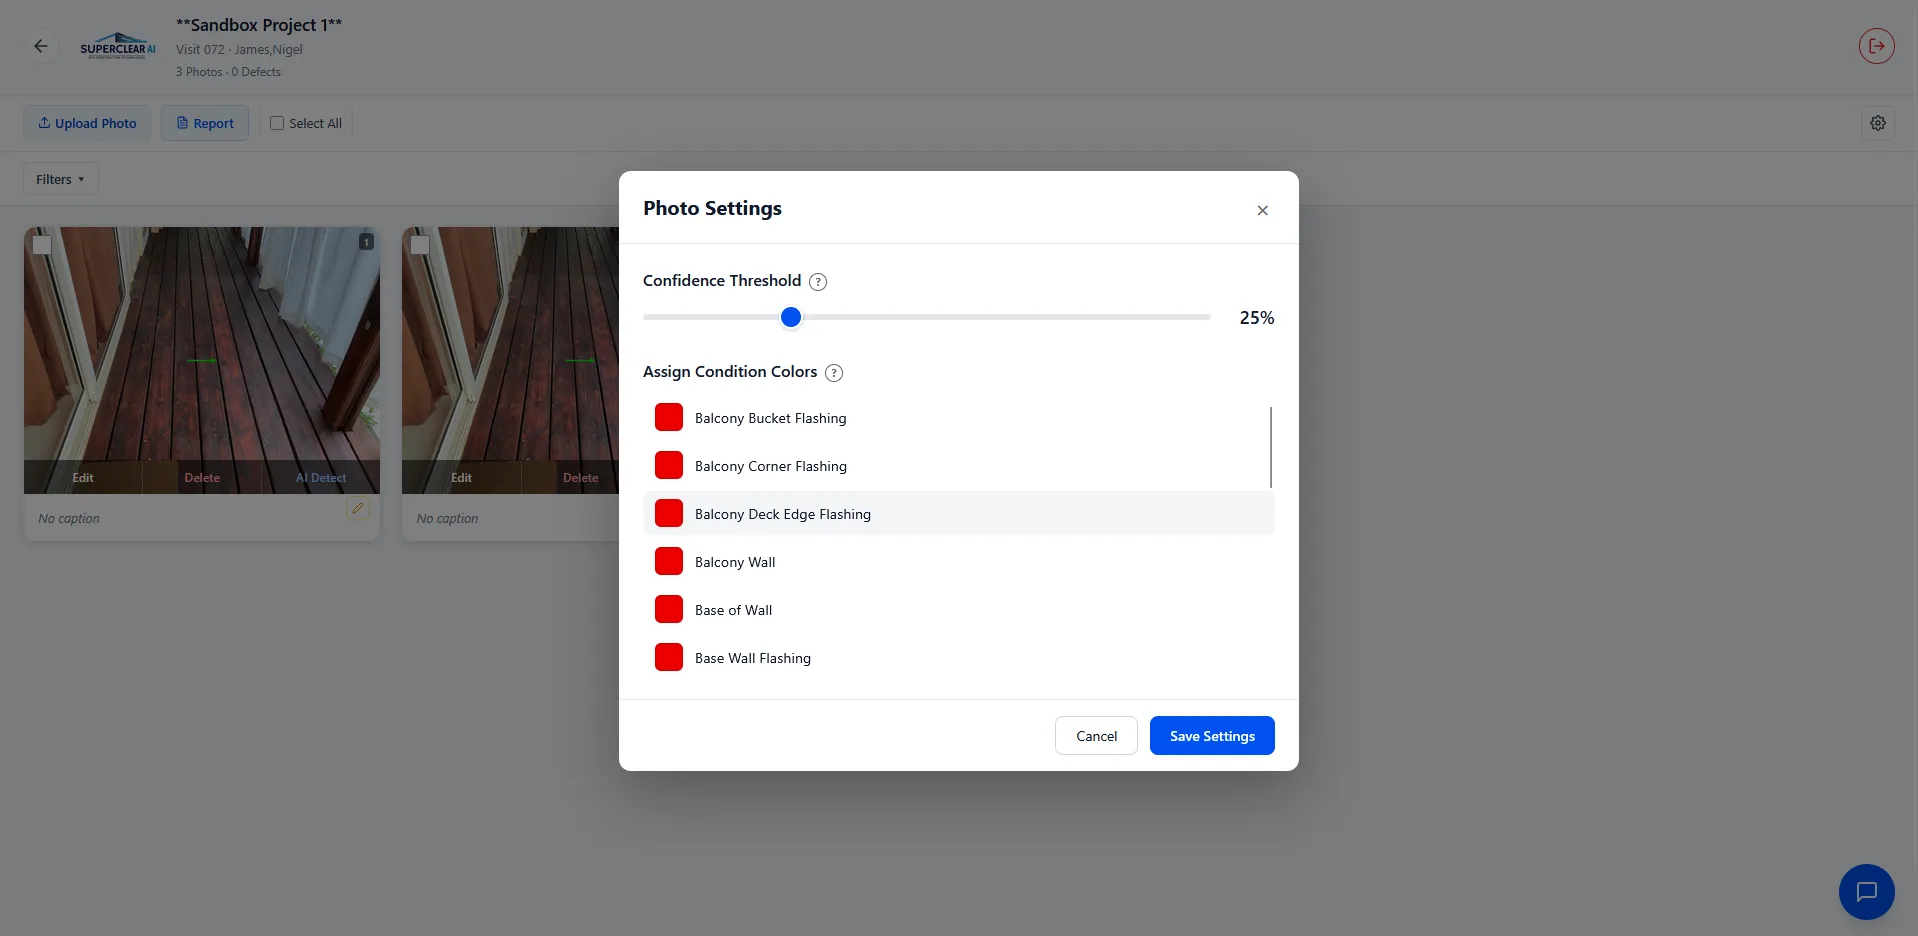
- The modal opens with two sections: Confidence Threshold and Assign Condition Colors
Confidence Threshold
Section titled “Confidence Threshold”Every AI detection has a confidence score between 0% and 100% — the model’s estimate of how sure it is that the detection is correct. The threshold filters out anything below your chosen value. Detections above the threshold are shown on the photo; detections below are hidden (but not deleted — if you lower the threshold later, they reappear).
How to Use the Slider
Section titled “How to Use the Slider”- In Photo Settings, drag the Confidence Threshold slider
- The current value updates live to the right of the slider (e.g. 25%)
- Click Save Settings to apply — the photo grid refreshes to reflect the new threshold
Practical Ranges
Section titled “Practical Ranges”| Threshold | What you get | When to use it |
|---|---|---|
| 80–100% | Only the most certain detections. You’ll miss subtle defects but false positives are rare. | Final report review, client presentations, or when you don’t want to double-check edge cases. |
| 50–79% | High-confidence detections plus some borderline ones. Balanced signal-to-noise. | Day-to-day inspection review. A good general-purpose default for most tenants. |
| 25–49% | Most detections, including many the model isn’t sure about. Expect some false positives. | Thorough forensic reviews when you want to see everything the model flagged. |
| Below 25% | Every detection the model made, including low-confidence ones. Noisy. | Training data curation or diagnosing why the model is missing something. |
Per-Inspection, Not Per-Tenant
Section titled “Per-Inspection, Not Per-Tenant”Each inspection has its own threshold. Changing the slider on Inspection A does not affect Inspection B. This is deliberate — different sites have different risk profiles, and you might want to run tight filtering on a finished project while keeping a loose filter on an ongoing one.
Assigning Condition Colors
Section titled “Assigning Condition Colors”Every detection is labeled with a condition tag (e.g. Cracking, Spalling, Water Damage). The Condition Colors section lets you choose what color each tag renders in on the photo — the box outline, the label text, and the highlight color all pull from this setting.
Setting a Color
Section titled “Setting a Color”- In Photo Settings, scroll to Assign Condition Colors
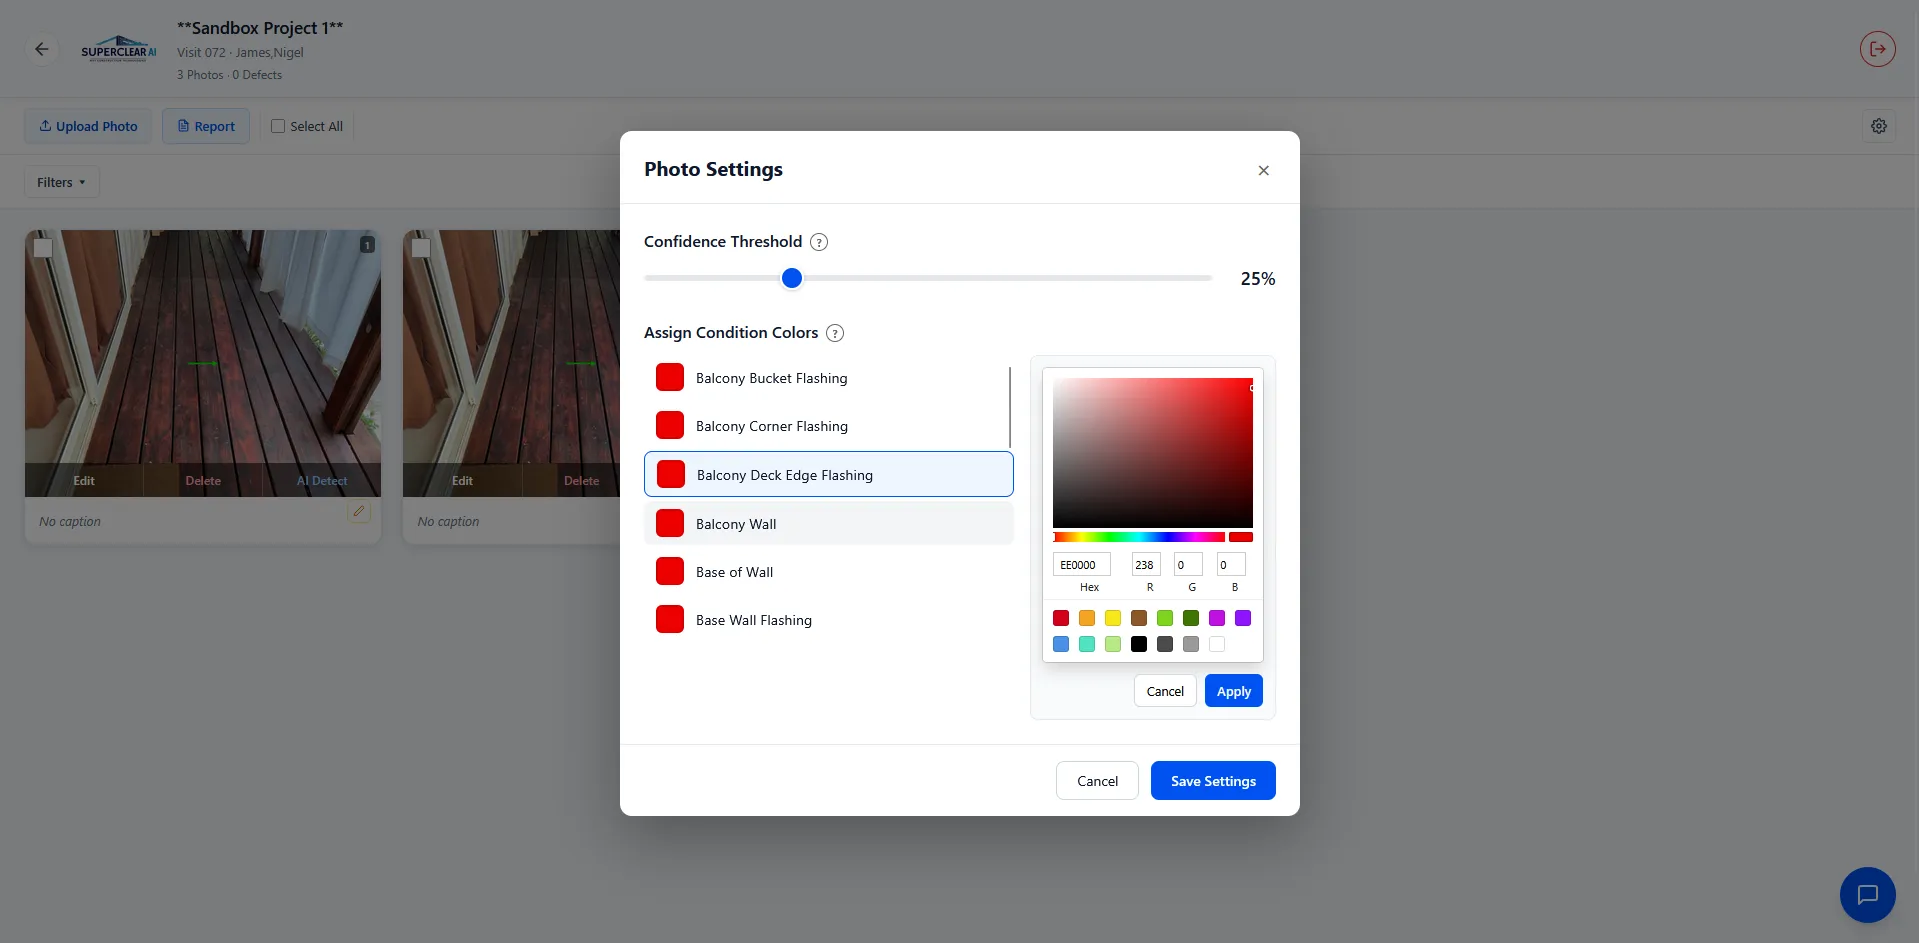
- Click the color swatch next to a condition name
- A color picker appears with hue wheel and hex input
- Pick a color or type a hex value (e.g.
#ee0000) - Click Apply — the swatch updates in the list
- Repeat for each condition you want to customize
- Click Save Settings to persist
Canceling a Color Change
Section titled “Canceling a Color Change”If you open the picker and change your mind, click Cancel inside the picker — the swatch goes back to its previous value. To abandon all unsaved changes, close the modal with the X or click outside it.
Default Colors
Section titled “Default Colors”Conditions without a custom color show in the default red (#ee0000). This ensures
every detection is visible even before you set up per-tenant colors. Only parent-level
conditions can be customized — sub-conditions inherit from their parent.
Choosing Colors Strategically
Section titled “Choosing Colors Strategically”- Group related conditions. Red for structural issues (Cracking, Spalling), yellow for moisture (Water Damage, Efflorescence), blue for envelope (Sealant, Glazing). Viewers can scan by color without reading every label.
- Use high-contrast colors. Thin yellow on a sunlit photo is hard to see. Stick to saturated colors that pop off construction materials.
- Stay consistent across inspections. Pick a color scheme once and reuse it — your reports become instantly recognizable.
- Avoid red for non-critical conditions. Red carries visual weight. Save it for the conditions you want viewers to notice first.
Troubleshooting
Section titled “Troubleshooting”Changing the threshold doesn’t filter detections
Section titled “Changing the threshold doesn’t filter detections”Solutions:
- Make sure you clicked Save Settings — dragging the slider alone doesn’t apply the change
- Refresh the photo grid after saving; some browsers cache the previous render
- If the threshold is already at 0%, nothing is being filtered — raise it
Save fails with an error
Section titled “Save fails with an error”Solutions:
- Check your internet connection — settings save to the server
- If you’re offline, the changes won’t persist. Reconnect and try again.
Colors aren’t showing on photos
Section titled “Colors aren’t showing on photos”Solutions:
- Verify the photo has detections with that condition — empty photos show no color
- Refresh the detection overlay by toggling the detection visibility in the photo grid
The condition list is empty
Section titled “The condition list is empty”Solutions:
- This inspection has no conditions configured yet. Conditions are set at the tenant level — contact your administrator or support@nxtconstruction.ai to add them.