
Managing Employees in nSpec
Employees are the people in your organization who use nSpec to perform inspections and manage projects. As an admin or supervisor, you’ll add employees, assign them to offices, mark some of them as supervisors, and manage their roles. This article walks through every step.
Accessing the Employees Screen
Section titled “Accessing the Employees Screen”- Sign in to nSpec at inspect-app.nspec.app
- Open the sidebar (☰ menu)
- Click Employees
The Employees List
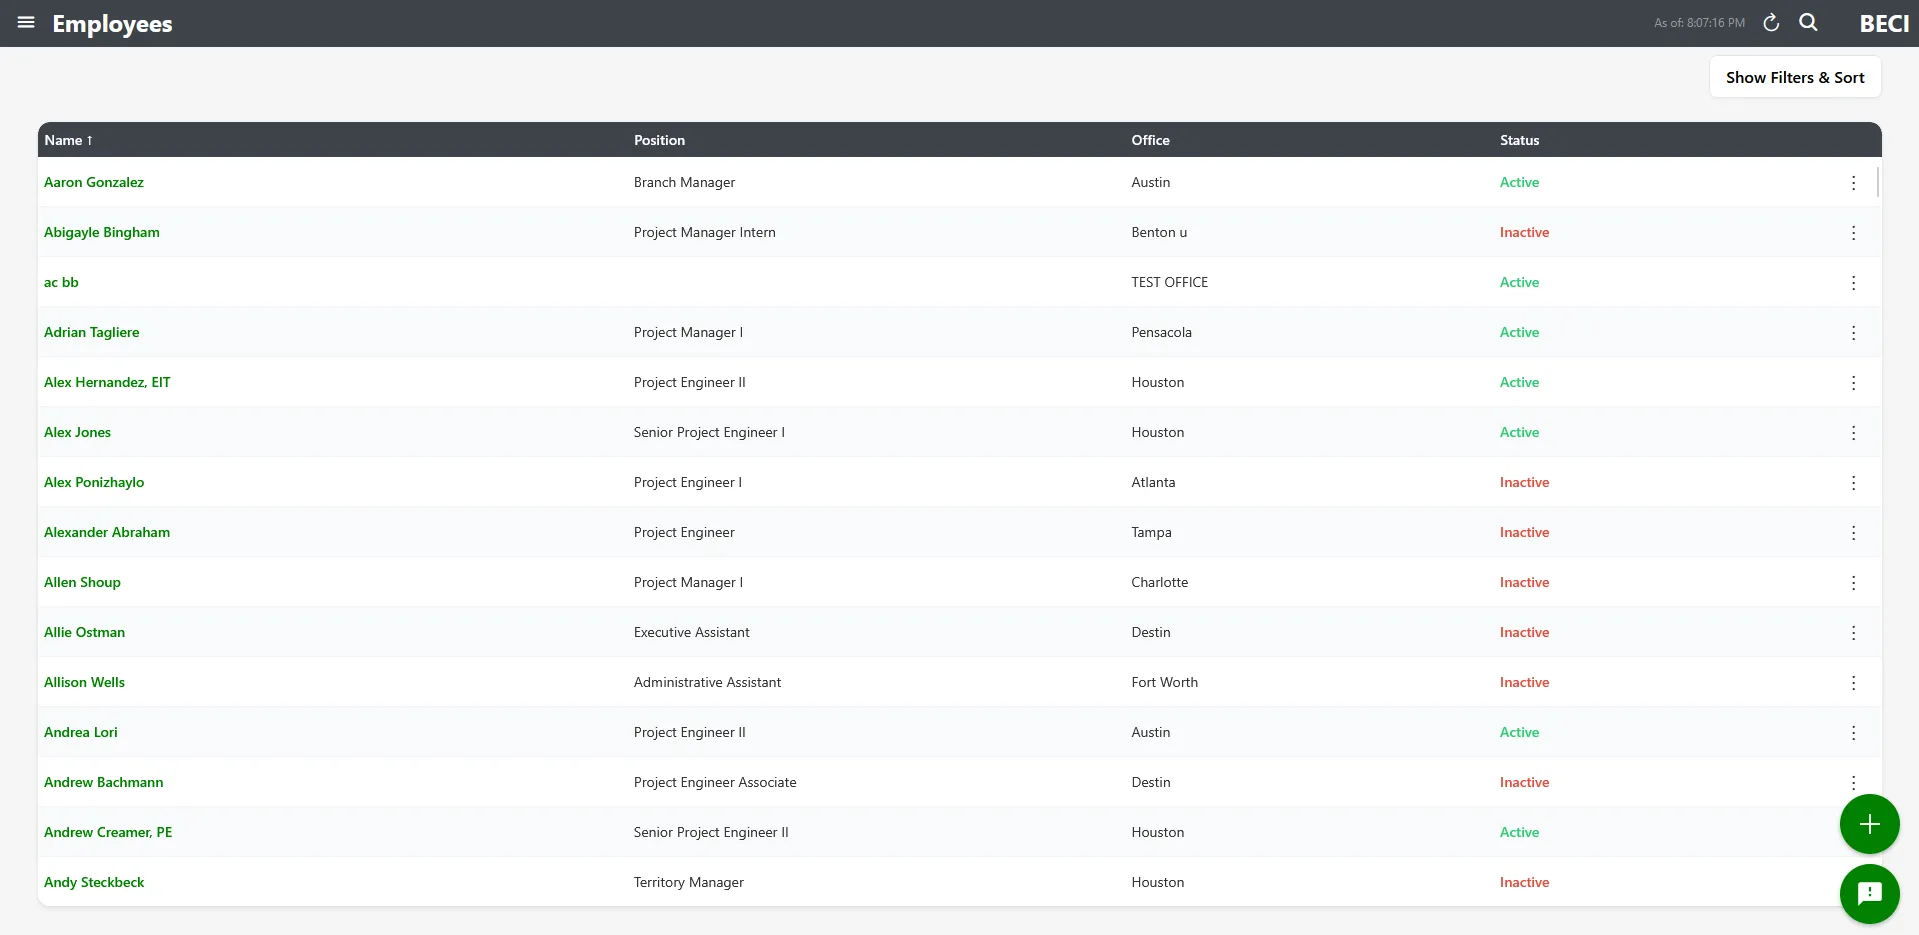
Section titled “The Employees List”The Employees screen shows everyone in your organization with an nSpec account. The table shows each person’s name, title, office, and active status.
Search and filter
Section titled “Search and filter”- Search bar — Searches across first name, last name, title, and office
- Status filter — All / Active / Inactive — useful for hiding deactivated employees
- Office filter — Limit the list to a specific office (NSPEC tenants only)
- Sort options — Sort by Name, Position, or Office (each A-Z and Z-A)
Adding an Employee
Section titled “Adding an Employee”- On the Employees screen, click the + floating action button in the bottom-right
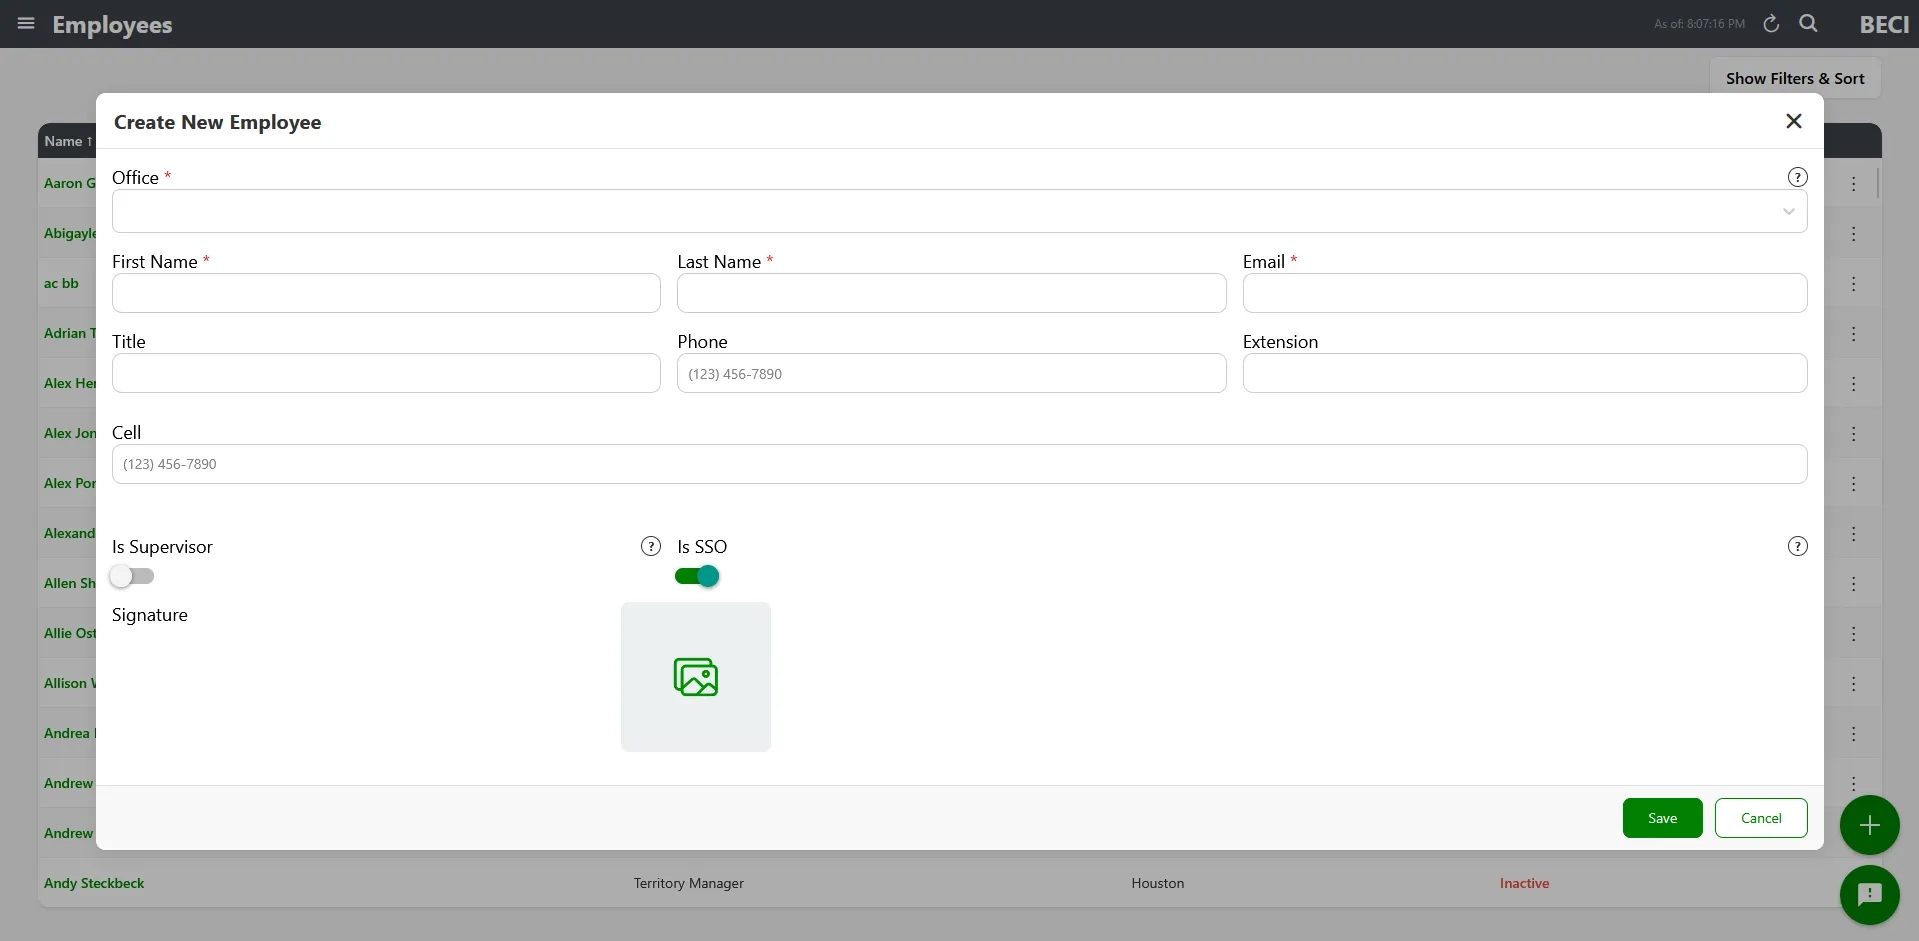
- The Create Employee modal opens
- Fill in the fields below
- Click Save
Employee fields
Section titled “Employee fields”| Field | Required | Notes |
|---|---|---|
| Office | Yes | Pick the office this employee belongs to. NSPEC only — Procore tenants auto-populate this. |
| First Name | Yes | Up to 100 characters |
| Last Name | Yes | Up to 100 characters |
| Yes | Up to 200 characters. Must be a valid email — this is the employee’s sign-in identifier. | |
| Title / Position | No | Up to 200 characters (for example, “Senior Inspector”) |
| Phone | No | Office phone number |
| Extension | No | Up to 10 characters |
| Cell | No | Mobile phone number |
| Is Supervisor | No | Checkbox. Supervisors can be assigned to projects and inspections, and they can see the Employees screen themselves. NSPEC only. |
| Is SSO | No | Checkbox, defaults to checked. Controls whether this employee signs in via Microsoft SSO or with a regular nSpec password. Only visible if your tenant allows non-SSO accounts. |
| Additional Offices | No | Add other offices the employee can also work from. Only available after a primary office is selected. |
| Signature | No | Upload an image of the employee’s signature for use on reports. NSPEC only. |
SSO vs Non-SSO Employees
Section titled “SSO vs Non-SSO Employees”nSpec supports two ways for an employee to sign in:
- SSO (Single Sign-On) — The employee signs in with their Microsoft work account. No nSpec password to remember. This is the default and recommended option.
- Non-SSO — The employee uses an email and a password specific to nSpec. Used when an employee doesn’t have a Microsoft account on your tenant’s domain.
The Is SSO checkbox in the Create Employee form controls which type of account is created. Once an employee is created, this is effectively locked — you can’t toggle an existing SSO employee to non-SSO or vice versa.
Editing an Employee
Section titled “Editing an Employee”- On the Employees screen, click the row for the employee (or use the action menu → Edit)
- The Edit Employee modal opens
- Update any field that’s still editable
- Click Save
In addition to the fields from the Create form, the Edit Employee modal has:
- Is Active — Uncheck to deactivate the employee. Deactivated employees can’t sign in, but their record is preserved.
- Send Invite — Re-send the invitation email (visible only for non-SSO employees)
- Set Password — Reset the employee’s password (non-SSO only)
- Edit Roles — Open the role assignment modal (requires the Employee Role Management permission)
- Delete — Permanently remove the employee (requires the Delete Employee permission)
Deactivating vs Deleting an Employee
Section titled “Deactivating vs Deleting an Employee”When an employee leaves your organization or shouldn’t have access anymore, you have two options:
- Deactivate (recommended) — Uncheck the Is Active checkbox in the Edit Employee modal and save. The employee can no longer sign in, but their record is preserved so historical inspections and reports keep their author info intact. You can reactivate them later if needed.
- Delete — Use the Delete button in the Edit Employee modal. This permanently removes the employee record. Use this only when you’re sure you’ll never need their account again.
Assigning Roles
Section titled “Assigning Roles”Roles control what an employee can see and do in nSpec. To assign roles to an employee:
- Open the Edit Employee modal for the person
- Click Edit Roles
- The role assignment modal shows roles assigned to this employee on one side and available roles on the other
- Move roles between the two lists
- Save
See Roles and Permissions for how to create and manage roles themselves.
Inviting and Resending Invites
Section titled “Inviting and Resending Invites”When you create an employee, they automatically receive an invitation email with a link to set up their account.
- SSO employees — Click the link to authorize their Microsoft account with nSpec
- Non-SSO employees — Click the link to set their initial password
If the employee never received the email or lost the link, open the Edit Employee modal and click Send Invite (or Set Password for non-SSO employees) to re-send.
Permissions Required
Section titled “Permissions Required”| Action | Permission |
|---|---|
| View the Employees screen | View Employees + Supervisor role |
| Create or edit employees | Add/Edit Employees |
| Delete employees | Delete Employee |
| Manage employee roles | Employee Role Management |
Troubleshooting
Section titled “Troubleshooting”I don’t see Employees in the sidebar
Section titled “I don’t see Employees in the sidebar”Problem: The menu item is missing.
Solutions:
- You need both the View Employees permission and a supervisor designation. Ask your administrator to verify your role.
- Procore tenants don’t have an Employees screen — user management is handled in Procore.
The Office dropdown is empty
Section titled “The Office dropdown is empty”Problem: When creating an employee, the Office field has no options.
Solutions:
- You need to create at least one office first. See Managing Offices in nSpec.
An employee says they didn’t receive their invite email
Section titled “An employee says they didn’t receive their invite email”Problem: The invitation didn’t arrive.
Solutions:
- Ask the employee to check their spam folder
- Open the Edit Employee modal and click Send Invite (or Set Password for non-SSO) to resend
- Verify the email address you entered matches the employee’s actual email
- For SSO accounts: confirm the email is on a domain registered with your Microsoft tenant
I don’t see the Is SSO checkbox
Section titled “I don’t see the Is SSO checkbox”Problem: The Is SSO option is missing from the Create Employee form.
Solutions:
- Your tenant may not have non-SSO accounts enabled. The checkbox only appears if SSO mixed-mode is allowed.
- Procore tenants don’t see this option at all.