
Your First nSpec Project
Once you’ve signed in to nSpec, your next milestone is creating your first project and starting an inspection inside it. This article walks you through the prerequisites, the project create form, and what happens after the project is saved.
Before You Start: Create a Client First
Section titled “Before You Start: Create a Client First”In nSpec, every project belongs to a client — the company you’re inspecting for. You cannot create a project until at least one client exists. If your tenant is brand new, this is your real first step.
- Open the sidebar and click Clients
- Click the Add (plus) button to open the Create Client form
- Fill in the client name, office, and any other details required by your tenant
- Click Save
See Managing Clients in nSpec for the full client setup walkthrough, including division support and the difference between Procore and standard tenant client forms.
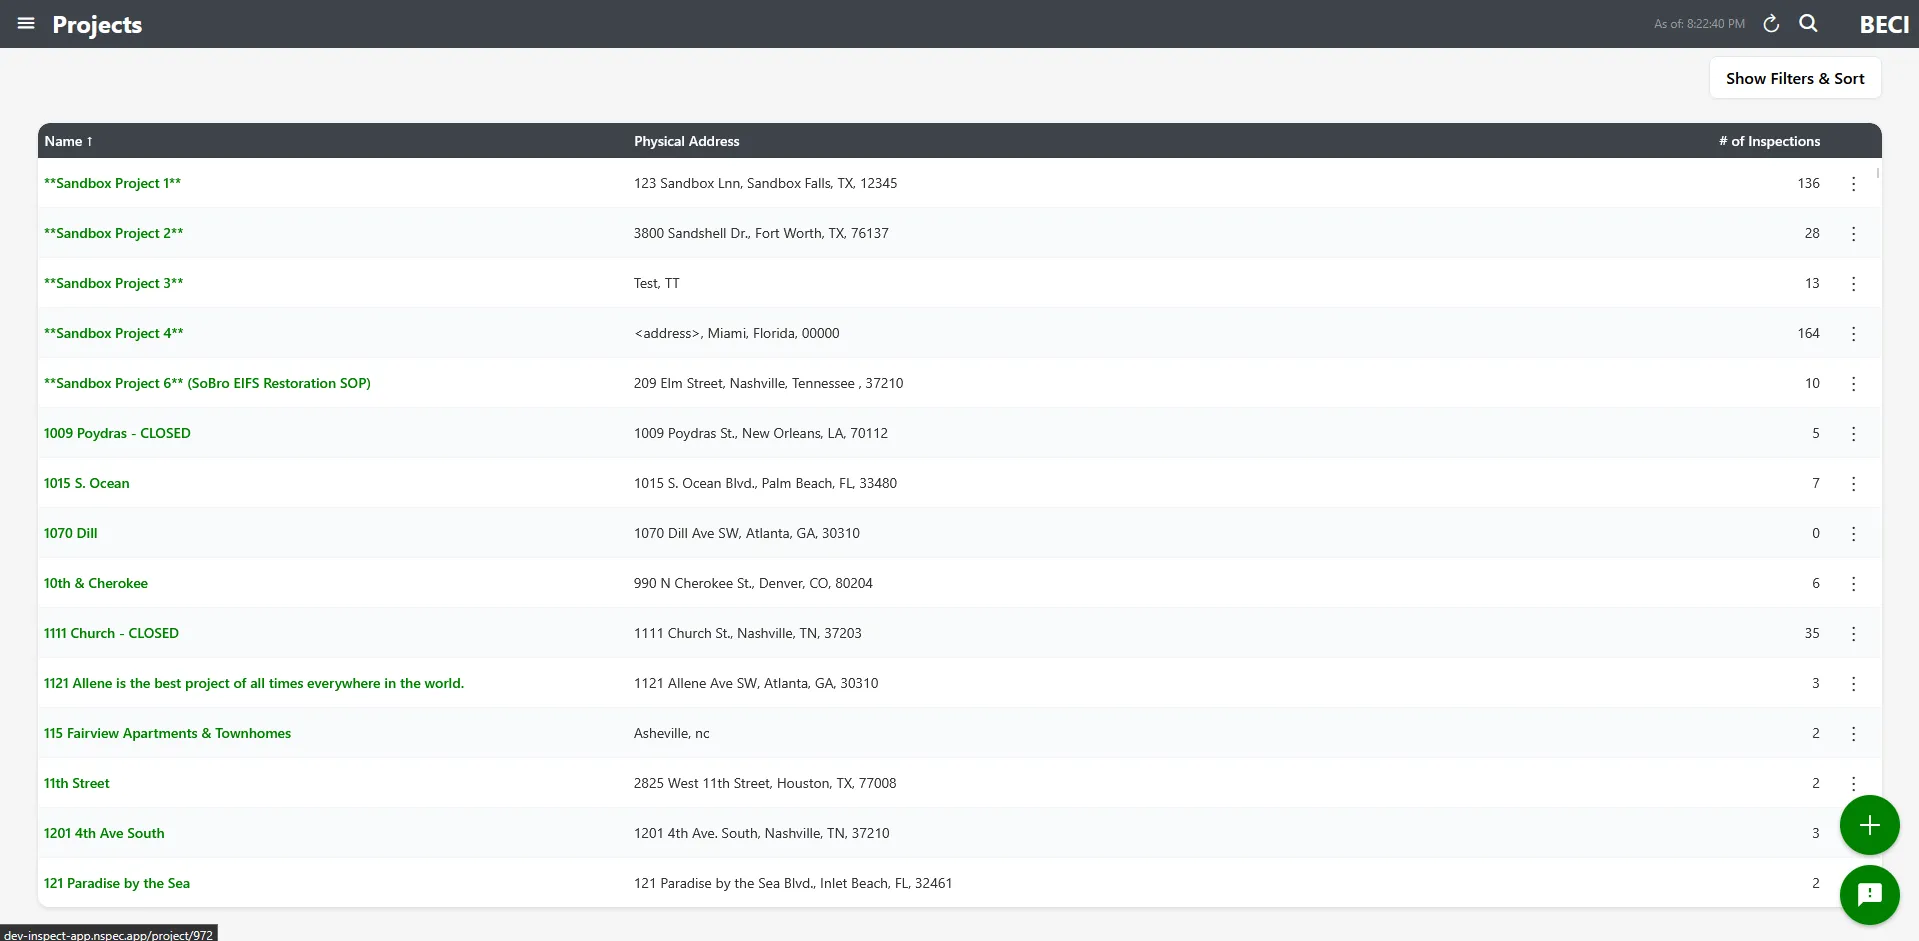
Step 1: Open the Projects Screen
Section titled “Step 1: Open the Projects Screen”- Sign in to nSpec at inspect-app.nspec.app
- Open the sidebar and click Projects
- You’ll see a list of any existing projects, plus a green + floating action button in the bottom-right corner
Step 2: Open the Create Project Form
Section titled “Step 2: Open the Create Project Form”- Click the + button in the bottom-right corner of the Projects screen
- The Create Project modal opens
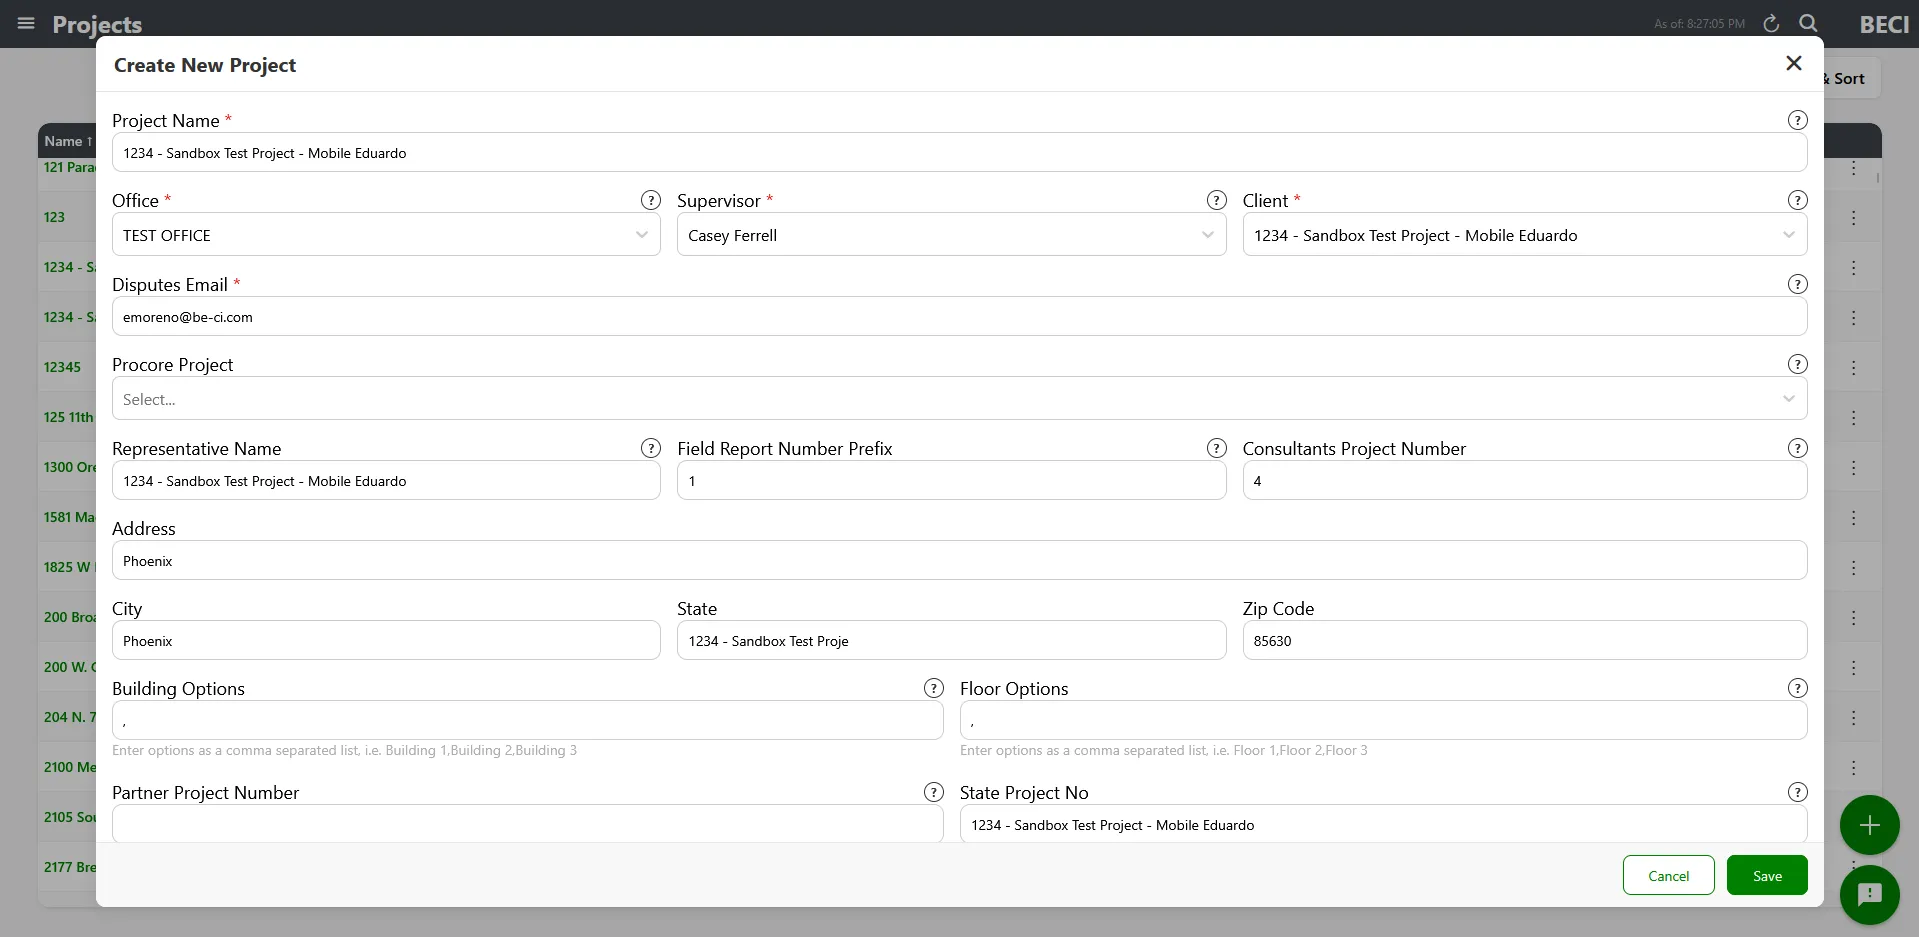
Step 3: Fill In the Project Details
Section titled “Step 3: Fill In the Project Details”The Create Project form has a small set of required fields and a longer list of optional ones. Don’t feel like you need to fill in every field — just the required ones get you started, and you can edit the rest later.
Required fields
Section titled “Required fields”| Field | What to enter |
|---|---|
| Client | Pick the client this project belongs to from the dropdown. If the dropdown is empty, you need to create a client first (see the prerequisite section above). |
| Project Name | The name your team will use to identify this project. Pick something specific so it doesn’t get confused with similar projects. |
| Address | The street address of the project site |
| Starting Visit Count | What number the first inspection should be. Defaults to 1. Only change this if you’re carrying over inspections from another system and need to continue an existing visit count. |
| Office | Which office in your organization owns this project. Defaults to your office. |
| Supervisor | The supervisor responsible for this project. Defaults to the first active supervisor. |
Optional fields
Section titled “Optional fields”These can be filled in now or added later from the project’s edit form:
- City, State, Zip Code — Helps with reporting and search
- Project Code — Internal reference number
- Field Report Prefix — Prefix for field report numbering
- Consultant’s Project Number — If a consultant has their own number for this project
- Notes — Free-text notes about the project
- Contract Completion Date — Check the box to enable, then pick a date
- Building / Floor Options — Configure the building and floor structure used during inspections
- Primary Rep Name — Your main contact at the client
- Disputes Email — Email address used for dispute notifications
- Partner Project Number — If a partner has their own project number
- State Project Number — Used in some jurisdictions
- Project Contacts — Add multiple contacts for the project
Step 4: Save the Project
Section titled “Step 4: Save the Project”- Click Save at the bottom of the form
- The modal closes and you return to the Projects screen
- Your new project appears in the list — usually at the top
Step 5: Create Your First Inspection
Section titled “Step 5: Create Your First Inspection”A project on its own doesn’t do anything until you create an inspection inside it. Inspections are where you record observations, take photos, and generate reports.
-
From the Projects screen, click your new project
-
You’re taken to the project detail screen, which shows the list of inspections (empty for now) and a + floating action button
-
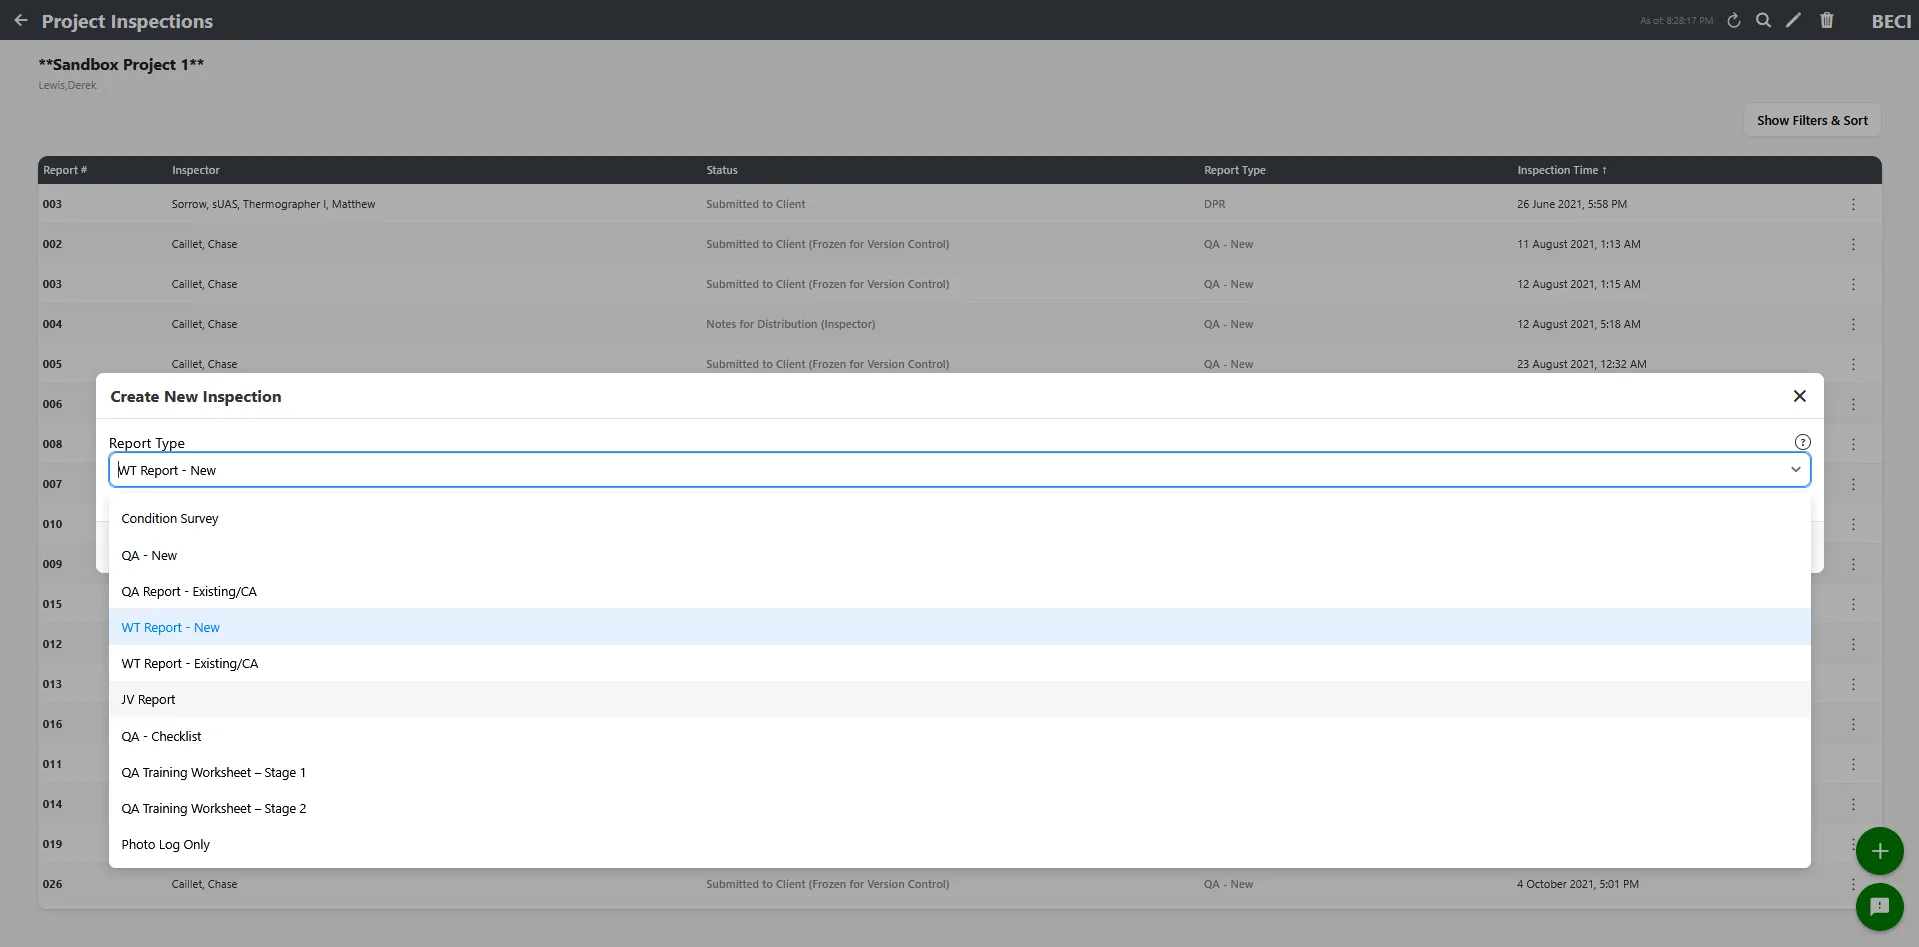
Click the + button to open the Create Inspection modal
-
Fill in the inspection details:
- Inspector — Who is performing this inspection
- Supervisor — Defaults to the project’s supervisor
- Inspection Date — Defaults to right now
- Report Type — The kind of report this inspection will produce. Defaults to the most common type.
- Weather — Defaults to “Sunny” — change if needed
- Temperature — Optional
-
Click Save — you’ll be taken straight into the inspection screen, ready to record your first observation
What’s Next After Your First Inspection
Section titled “What’s Next After Your First Inspection”Once you’re inside an inspection, you can:
- Add observations — The core unit of an inspection. Each observation describes one finding with photos and notes.
- Add specimens — Recordings of physical samples or test results
- Add action items — Tasks that need to be addressed (and that sync to Procore for Procore tenants)
- Generate a report — When the inspection is complete, generate a PDF
Each of those workflows has its own dedicated article:
- Working with Inspections in nSpec
- Specimens and Figures
- Photo Organization and Tagging
- Recommendations in Inspections
- Understanding nSpec Report Types
Troubleshooting
Section titled “Troubleshooting”The Client dropdown is empty
Section titled “The Client dropdown is empty”Problem: You opened the Create Project form but there are no clients to choose from.
Solutions:
- You need to create a client first. See Before You Start: Create a Client First above.
- If your administrator added clients but they’re not showing, refresh the page
- Make sure the client has the correct office assigned — if your tenant filters clients by office, you’ll only see clients in your office
The Supervisor dropdown is empty
Section titled “The Supervisor dropdown is empty”Problem: The Supervisor field has no options.
Solutions:
- Your administrator needs to mark at least one employee as a supervisor. Ask them to update employee roles.
- The supervisor must be active — inactive employees don’t appear in the dropdown
I don’t see a + button on the Projects screen
Section titled “I don’t see a + button on the Projects screen”Problem: The floating action button is missing.
Solutions:
- Your role may not have permission to create projects. Ask your administrator to verify your role.
- Refresh the page
- If you’re in offline mode, switch back online — you cannot create new projects offline
Save button is disabled or returns an error
Section titled “Save button is disabled or returns an error”Problem: The form won’t submit.
Solutions:
- Check that all required fields are filled in (Client, Project Name, Address, Office, Supervisor)
- Look for any red validation errors below specific fields
- If you’re a Procore tenant and the project is linked to a Procore project, the Procore Default Type field is also required — see Setting Up Procore Default Fields