
Getting Started with nSpec
Welcome to nSpec — the field inspection platform built for construction professionals. This article walks you through your very first session: signing in, finding your way around the dashboard, navigating the sidebar, and knowing where to go next. After this article, you’ll know enough to start your first inspection.
Step 1: Open nSpec
Section titled “Step 1: Open nSpec”nSpec runs in your web browser — no install required.
- Open your browser (Chrome, Edge, or Safari recommended)
- Go to https://inspect-app.nspec.app
- Optional but recommended: bookmark the page or add it to your home screen so you can find it again later
Step 2: Sign In
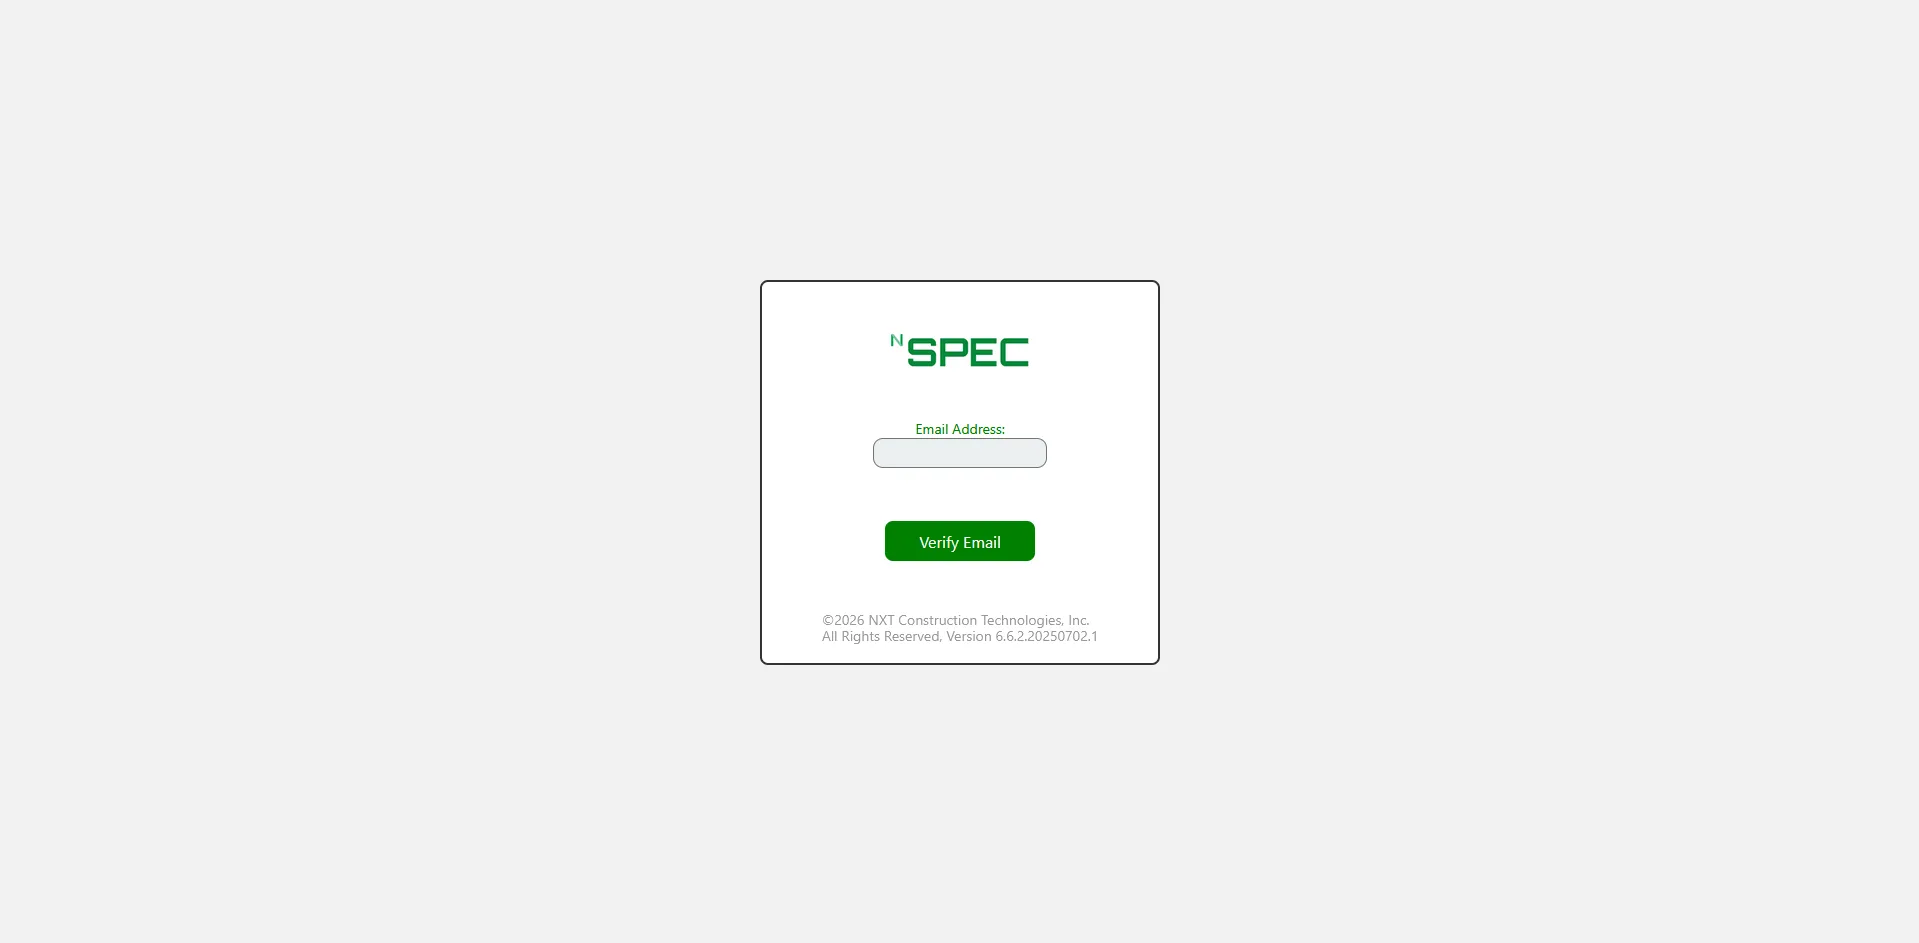
Section titled “Step 2: Sign In”nSpec uses a two-step sign-in. You enter your email first, then nSpec figures out the right way to sign you in based on whether your organization uses Microsoft single sign-on (SSO) or a regular nSpec password.
-
On the sign-in screen, type your email address
-
Click Verify Email
-
What happens next depends on your account type:
- Microsoft SSO accounts: nSpec redirects you to the Microsoft sign-in page. Enter your Microsoft password (and any 2FA your organization requires) and you’ll come back to nSpec automatically.
- Standard accounts: A password field appears on the same screen. Enter your nSpec password and click Login. If you’ve forgotten it, click Forgot Password? to reset it.
Step 3: First-Time Setup Modals
Section titled “Step 3: First-Time Setup Modals”The very first time you sign in, nSpec shows you two short modals before you reach the dashboard. You only see these once.
- Agreement Terms — Read and accept the terms of service to continue
- Patch Notes — Quick summary of what’s new in the latest release. Click through to dismiss.
After both modals close, you’ll land on the dashboard.
Step 4: Find Your Way Around the Dashboard
Section titled “Step 4: Find Your Way Around the Dashboard”The dashboard is the main hub of nSpec. It shows you what needs your attention in a series of cards. The exact cards you see depend on your role.
| Card | What it shows |
|---|---|
| Last Viewed Inspections | Your most recently opened inspections. Click any one to jump straight back in. (Procore tenants see “Last Viewed Projects” instead.) |
| Outstanding Inspections | Inspections that are still incomplete or overdue. Click to see the full list. |
| Action Items | Counts of pending action items and any items that are out of sync with Procore (Procore tenants only). |
| Unread Collaboration Messages | Messages from collaborators (external users like clients or contractors) on your action items. |
| Inspection Statistics | Quick stats — total inspections, average lag, on-time percentage. Filter by date range using the dropdown. |
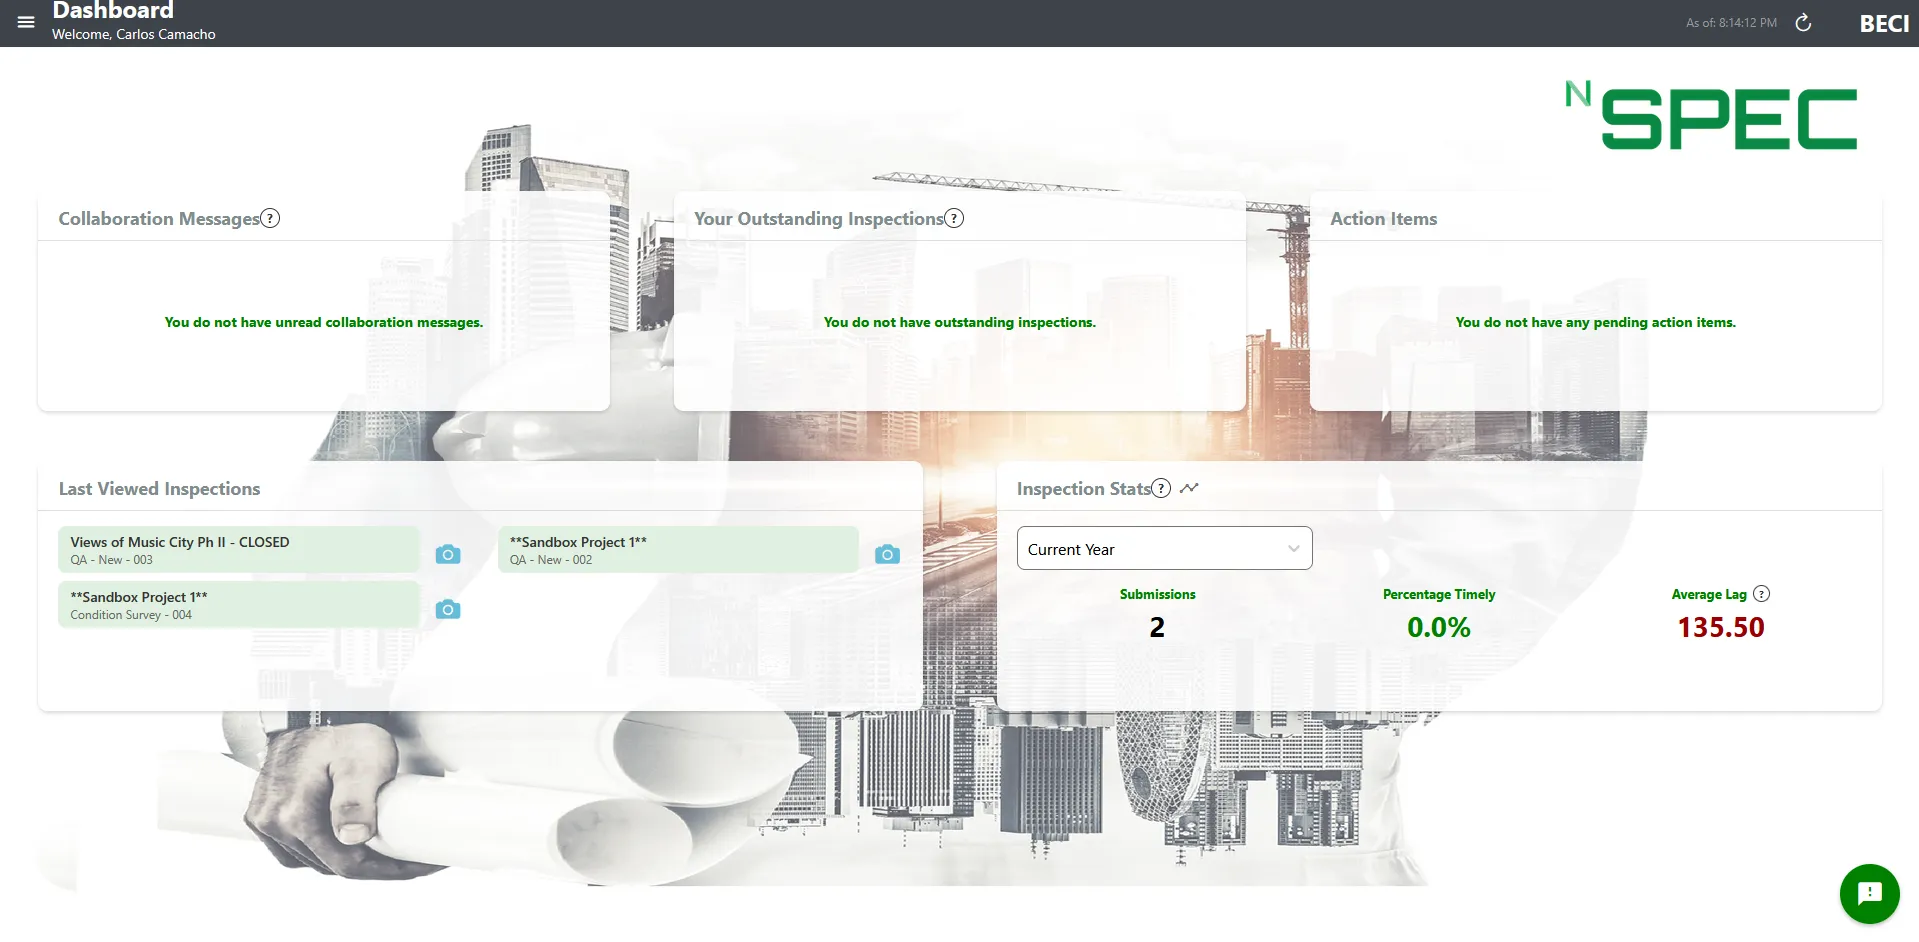
Each card has its own refresh button so you can reload just that card without refreshing the whole page.
Step 5: Use the Sidebar to Navigate
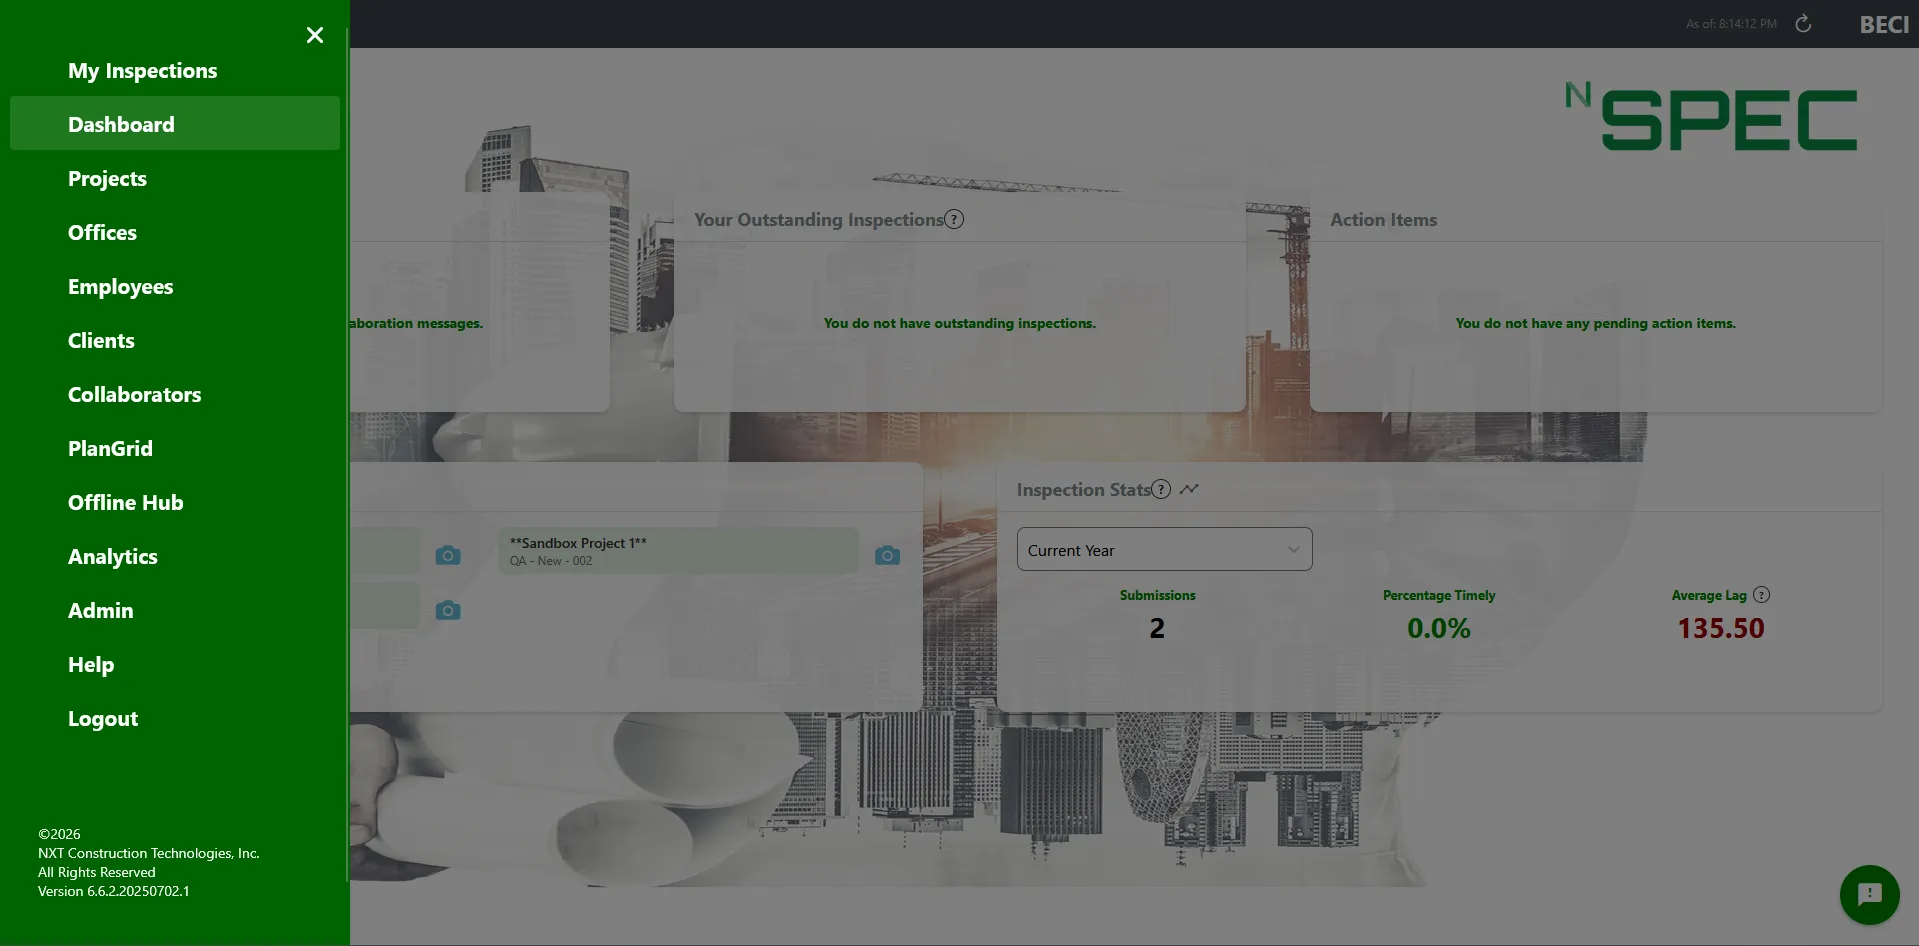
Section titled “Step 5: Use the Sidebar to Navigate”Click the menu icon (☰) in the top-left corner to open the sidebar. From there you can jump to any of the major screens in nSpec. The exact items depend on your role and tenant type.
| Sidebar item | Goes to | Visible to |
|---|---|---|
| Dashboard | The main hub you just saw | All users |
| My Inspections | Inspections assigned to you | All users (NSPEC tenants) |
| Projects | List of all projects you can access | All users |
| Clients | List of clients | All users |
| Offices | List of offices in your organization | Employees (NSPEC tenants) |
| Employees | List of employees | Supervisors (NSPEC tenants) |
| Collaborators | External users with limited access | NSPEC tenants |
| Login Procore | Procore OAuth flow | Procore tenants only |
| Offline Hub | Manage offline inspections | NSPEC tenants |
| Analytics | Reports and metrics | All users |
| Admin | Tenant settings | Admins |
| My Account | Your profile and password | All users |
| Logout | Signs you out | All users |
Step 6: What to Do Next
Section titled “Step 6: What to Do Next”Once you’re comfortable with the dashboard, here are the natural next steps in your nSpec journey:
- Create a client — Open the Clients screen and add the company you’ll be inspecting for. See Managing Clients.
- Create a project — Once a client exists, open Projects and create a project under that client. See Your First nSpec Project for the full walkthrough.
- Create your first inspection — From the project, add an inspection and start recording observations, photos, and specimens. See Working with Inspections.
- Generate a report — When the inspection is complete, generate a PDF report from the inspection screen. See Understanding Report Types.
Working Offline
Section titled “Working Offline”If you’ll be inspecting in places without reliable internet, nSpec has an Offline Hub that lets you keep working when you lose your connection. See Offline Hub Guide for the full setup.
Getting Help
Section titled “Getting Help”- Knowledge Base — Browse the rest of the help center for detailed walkthroughs of every feature
- Support email — support@nxtconstruction.ai
- FAQ — nSpec Frequently Asked Questions
Troubleshooting
Section titled “Troubleshooting”I can’t sign in
Section titled “I can’t sign in”Problem: The sign-in page rejects your credentials.
Solutions:
- Double-check that you typed your email correctly
- If you’re an SSO user and the Microsoft sign-in fails, reset your password through your Microsoft account, not through nSpec
- If you’re a non-SSO user, click Forgot Password? on the sign-in screen
- Confirm your nSpec account exists — ask your administrator if you’re not sure
I see a blank screen after signing in
Section titled “I see a blank screen after signing in”Problem: The dashboard doesn’t load.
Solutions:
- Refresh the page
- Try a different browser (Chrome, Edge, or Safari)
- Clear your browser cache and try again
- If you’re on a Procore tenant, complete the Procore login flow you’ll be redirected to
Some menu items are missing from the sidebar
Section titled “Some menu items are missing from the sidebar”Problem: You expected to see items like Employees or Admin but they’re not there.
Solutions:
- Sidebar items are filtered by your role. Employees, Supervisors, and Admins see different items.
- Procore tenants don’t see Offices, Employees, Collaborators, or My Inspections — those are NSPEC-only.
- Ask your administrator to verify your role assignment.