
Adding Customers and Contacts in Quote Generator
Every quote is sent to a customer and signed by one of that customer’s contacts. This article shows an estimator how to add a customer, add its contacts, and why the order of those contacts matters before a proposal goes out.
Opening Customers
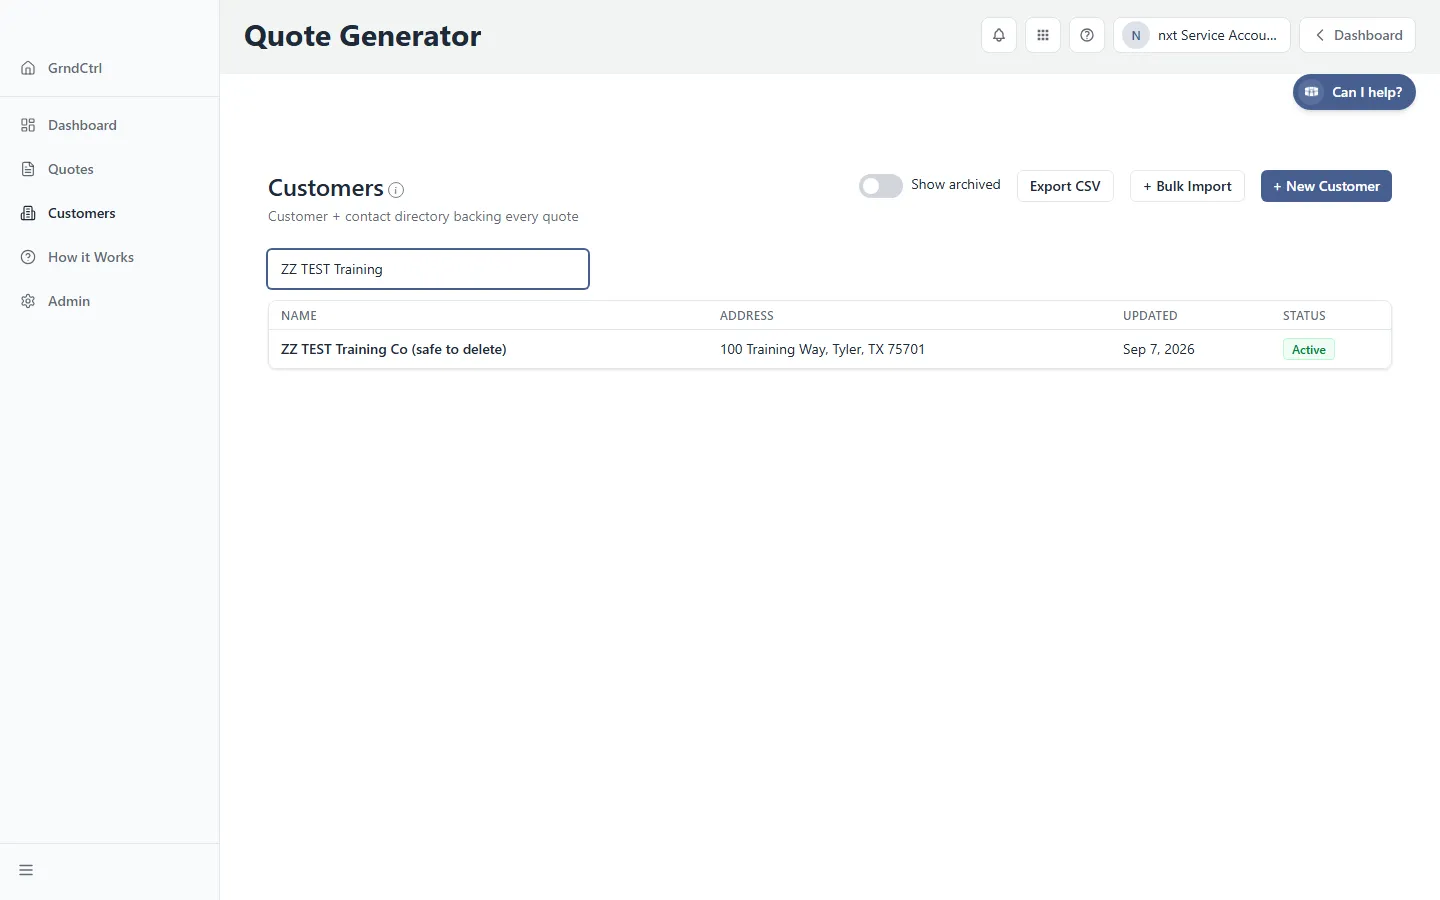
Section titled “Opening Customers”Open Quote Generator from the app launcher and click Customers in the sidebar. The page lists every customer with its address, when it was last updated, and its status. The search box filters by name, street, city, or state.
Adding a Customer
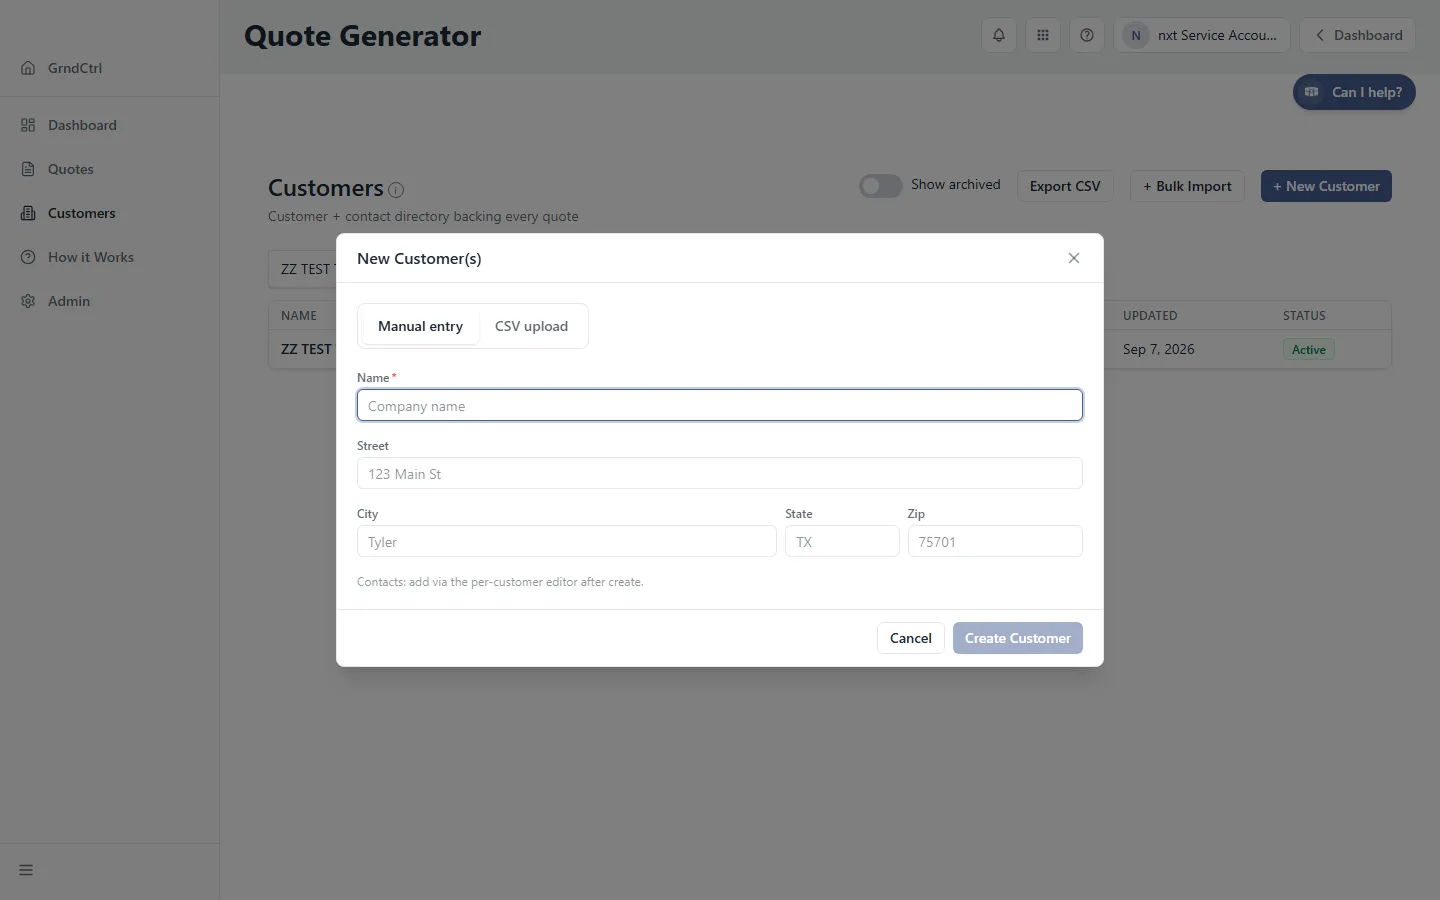
Section titled “Adding a Customer”- Click + New Customer. The New Customer(s) dialog opens on Manual entry.
- Enter the company name under Name. It is the only required field.
- Optional: enter the Street, City, State, and Zip.
- Click Create Customer. The new customer appears in the list; open it to add contacts.
Adding Contacts
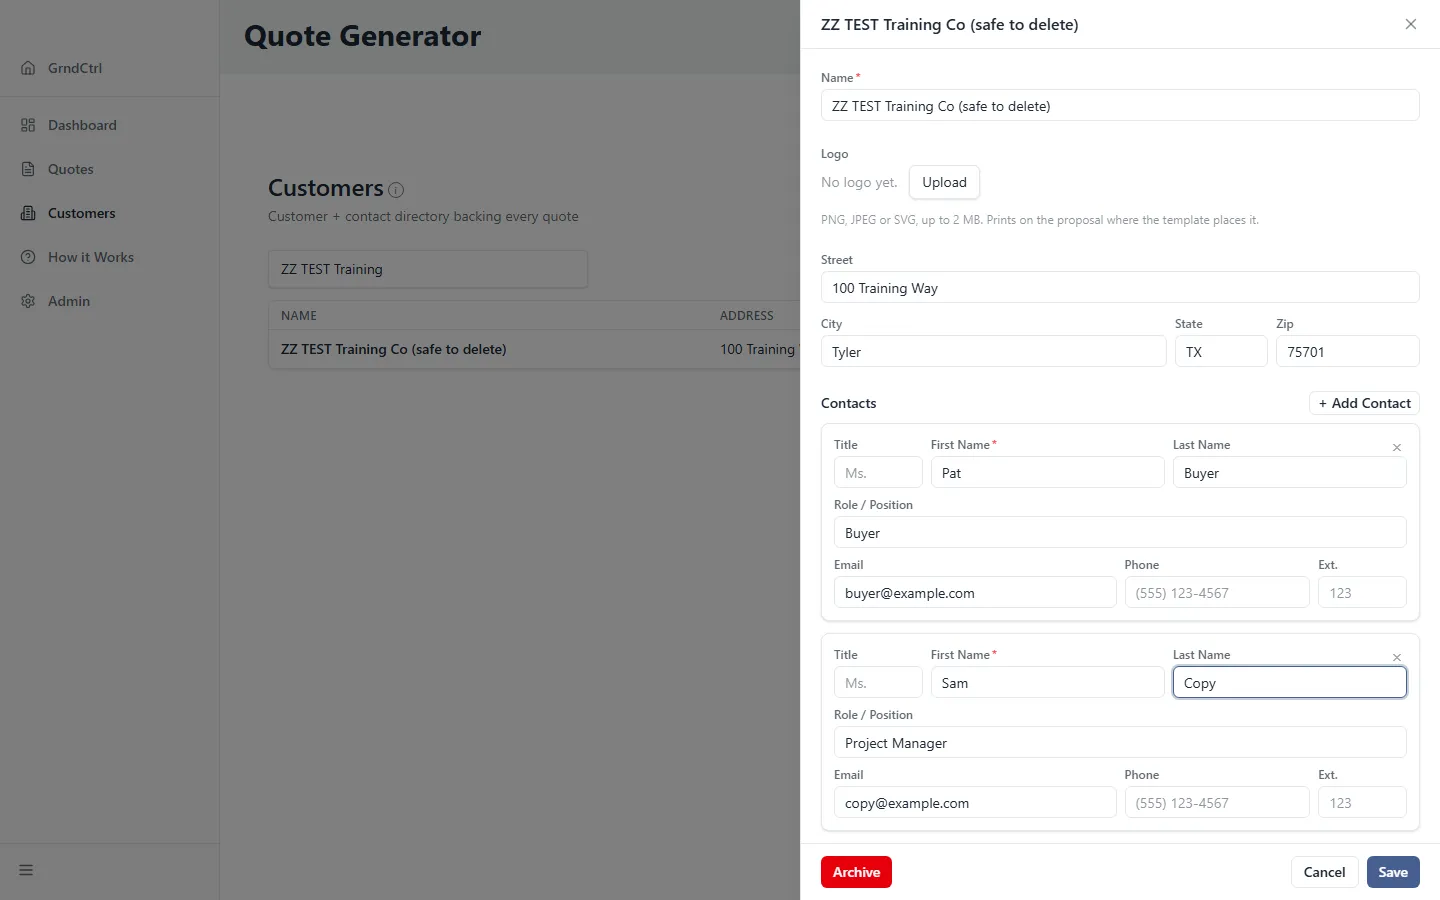
Section titled “Adding Contacts”Open the customer from the list. Under Contacts, click + Add Contact for each person.
- Click + Add Contact. A blank contact appears.
- Enter the First Name (required) and the Last Name.
- Optional: enter a Title, a Role / Position, an Email, a Phone, and an Ext..
- Repeat for the next contact, then click Save.
Editing or Archiving a Customer
Section titled “Editing or Archiving a Customer”Open the customer from the list to change its details or contacts, then click Save. Contacts keep the order they were added; to change who is first, remove and re-add contacts in the right order. Archiving hides a customer from new quotes without deleting it; turn on Show archived to see archived customers again.
Troubleshooting
Section titled “Troubleshooting”Create Customer is greyed out
Section titled “Create Customer is greyed out”Create Customer stays disabled until Name has a value. Every other field is optional.
The proposal went to the wrong person
Section titled “The proposal went to the wrong person”The signing link goes to the proposal contact, which is the first contact in the customer’s list unless a signer was chosen on the quote. Contacts keep the order they were added: remove and re-add them in the right order on the customer, or pick the signer under Signs on the quote before sending.