
Setting Up Pages, Headers and Footers
Page setup is where a template gets its paper, its type and its branding — the things that are true of every page rather than of one box. This article covers the Page setup tab, including the header and footer bands that repeat on every page.
Paper and Margins
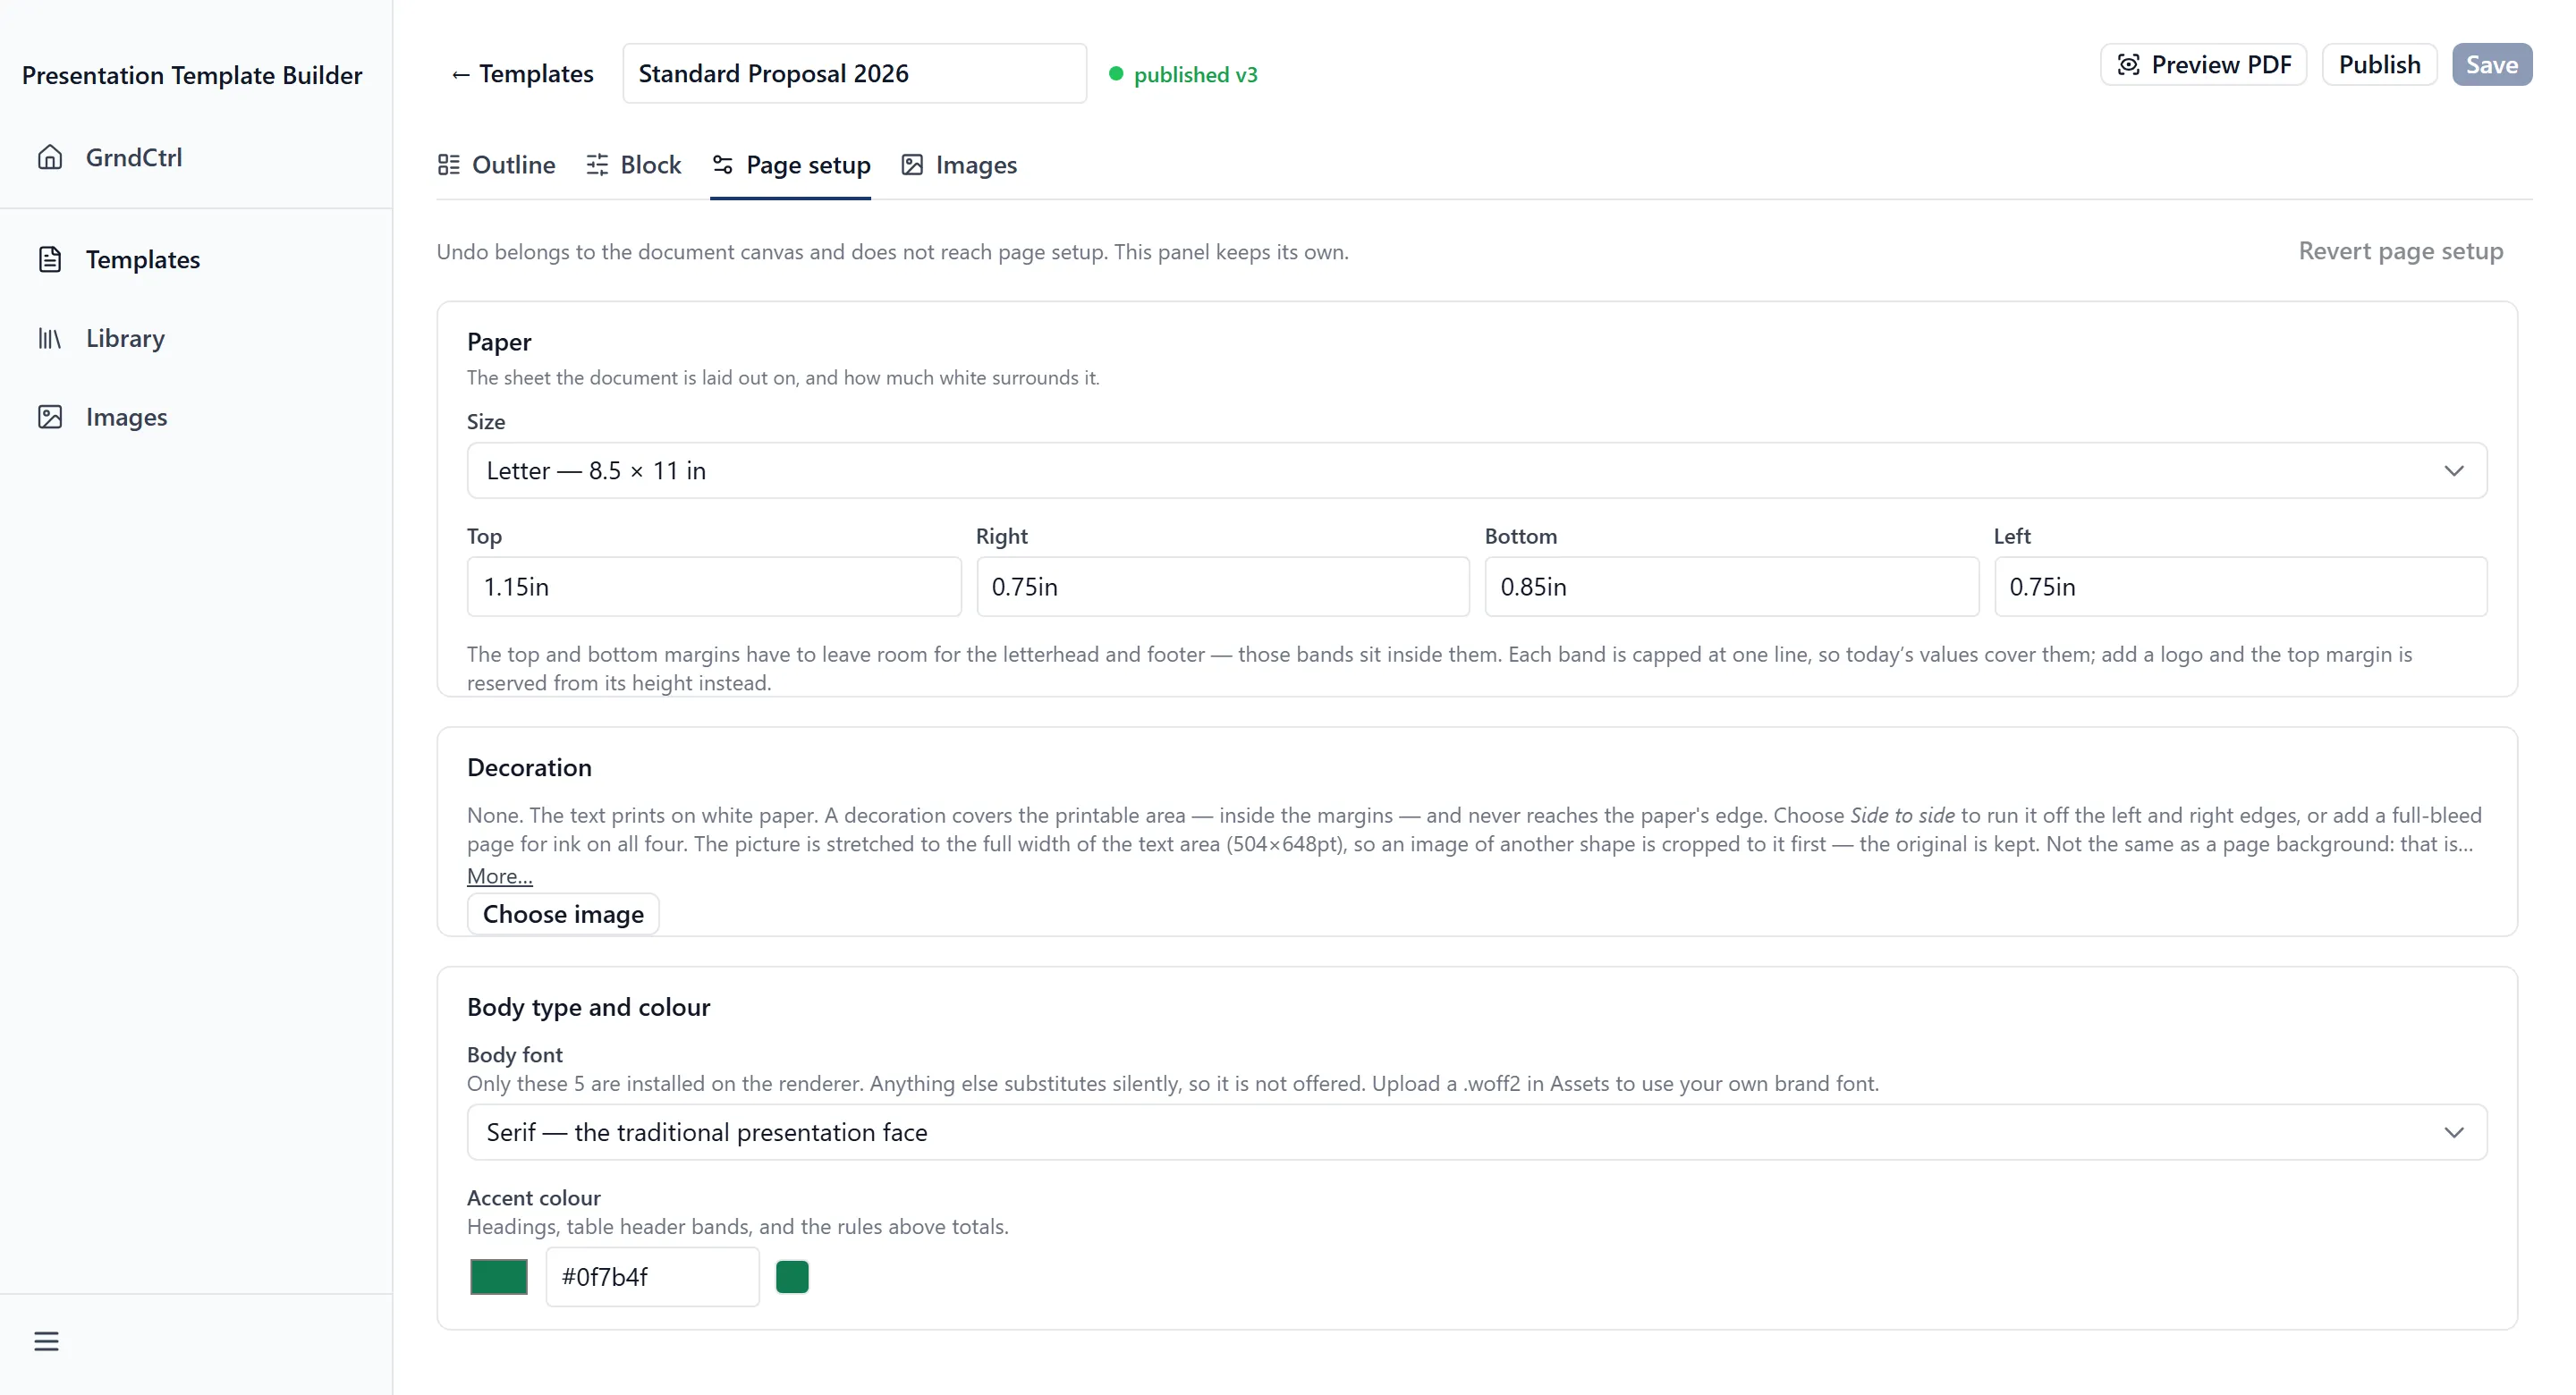
Section titled “Paper and Margins”The Paper section sets “The sheet the document is laid out on, and how much white surrounds it.”
- Choose a Size — for example Letter — 8.5 × 11 in.
- Set the Top, Right, Bottom and Left margins. Type a value with its unit,
such as
0.75in.
Decoration
Section titled “Decoration”A Decoration is artwork behind the text on every page. With none set, the section says “None. The text prints on white paper.”
Click Choose image to pick one; the control then reads Change image. Two settings decide how far it reaches:
- Inside the margins — it covers the printable area only
- Side to side — it runs off the left and right edges
Type and Colour
Section titled “Type and Colour”Body type and colour holds the two settings that carry a brand furthest.
- Body font — the document’s typeface. Only five faces are offered, because those are the ones the renderer has installed.
- Accent colour — “Headings, table header bands, and the rules above totals.” One colour changes all three.
Table Styling
Section titled “Table Styling”Tables sets “How every table in this document looks. A single table can override any of it on the Table tab.” Pick a Style preset:
| Preset | What it looks like |
|---|---|
| Plain | no rules, no banding |
| Ruled | hairlines under every row |
| Banded | shaded alternate rows |
| Boxed | an outer border and a full grid |
| Minimal | a plain header over a rule |
| Contrast | a strong header over banded rows |
Header row, Data rows and Frame and spacing open beneath for finer control. A preset “Sets every control below that still reads ‘Document default’.” — so anything you have already set by hand is left alone.
Document Title
Section titled “Document Title”Document title is “The PDF’s own title — what a reader sees in their viewer’s tab, not text on the page.”
- Fixed title — the same words on every document
- Or take it from the data (wins when set) — a field from the quote, so each document names itself. Click Change to pick a different field.
Header and Footer
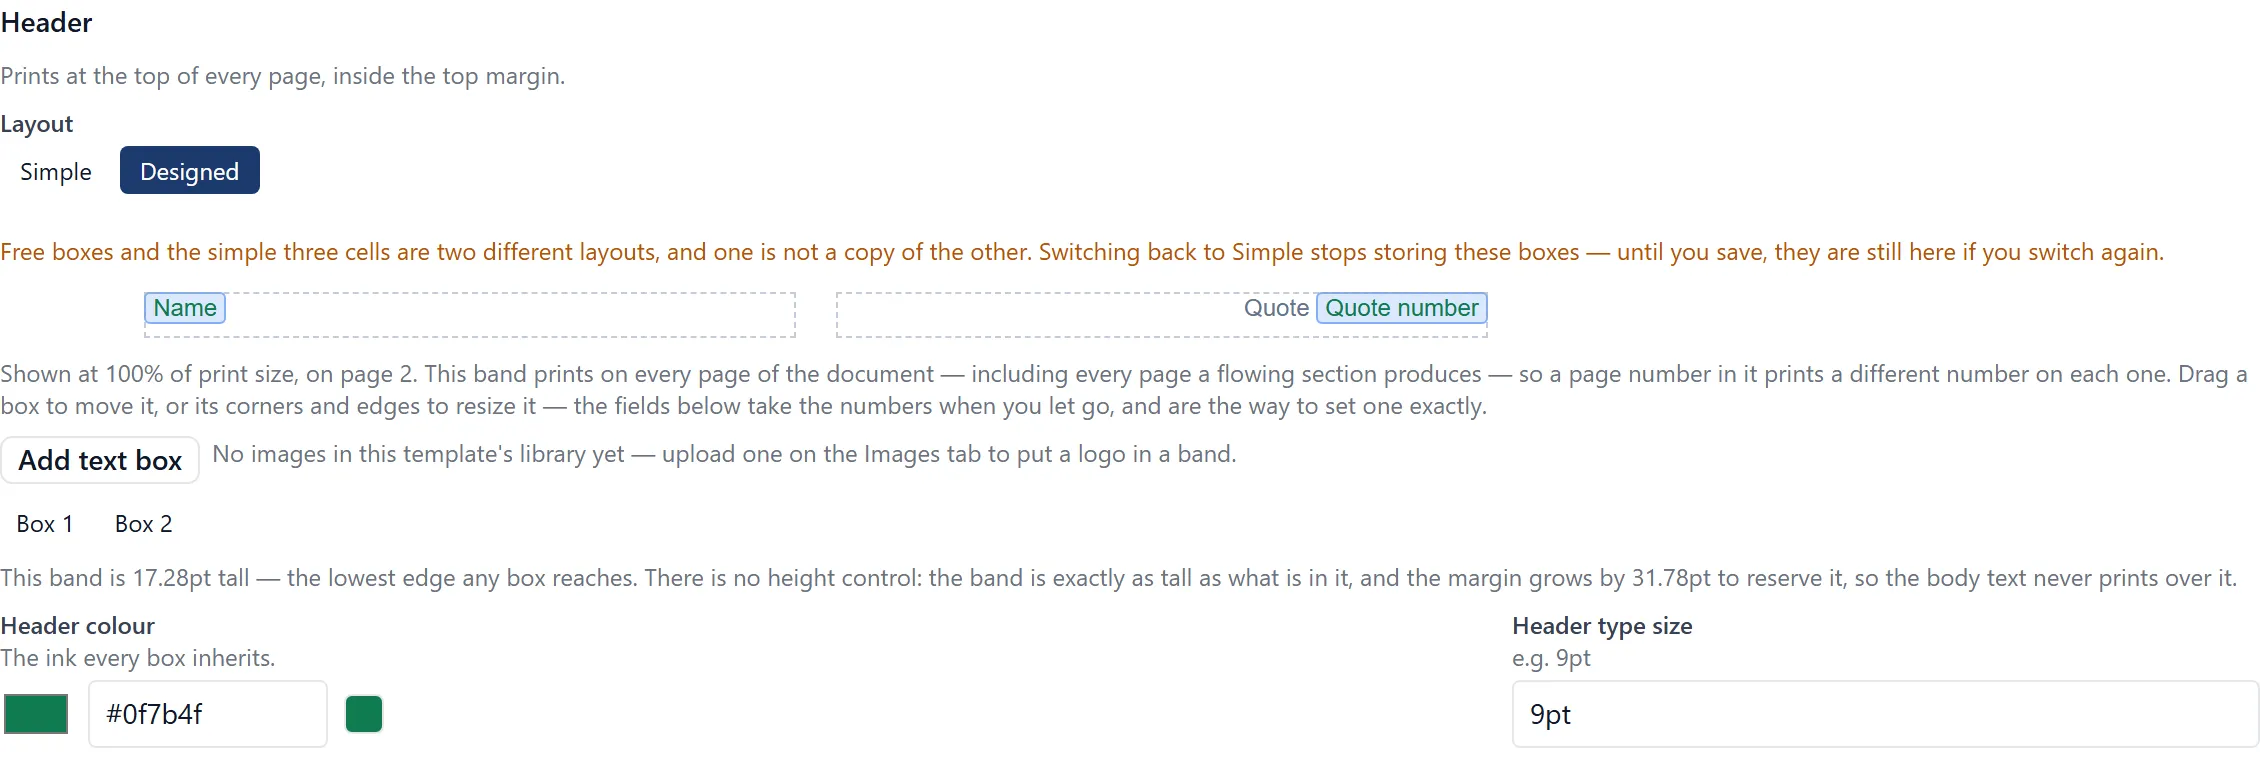
Section titled “Header and Footer”Header and footer holds the two bands that repeat on every page: Header “Prints at the top of every page, inside the top margin.” and Footer “Prints at the bottom of every page, inside the bottom margin.”
Each band has a Layout:
- Simple — “Three cells — left, centre, right. Each is one line and truncates.”
- Designed — “Free boxes you place yourself, with fills, borders and images.”
On Designed, click Add text box to add a box, then drag it to move it or drag its corners and edges to resize it. The numbered Box controls below take exact values when you need them. Header colour sets “The ink every box inherits.” and Header type size its size.
Undoing Page Setup
Section titled “Undoing Page Setup”The line at the top of the tab says it plainly: “Undo belongs to the document canvas and does not reach page setup. This panel keeps its own.”
Use Revert page setup to put paper, margins, fonts, accent colour, table styling and the bands back to what they were when you opened the tab.
Troubleshooting
Section titled “Troubleshooting”My brand font isn’t in the list
Section titled “My brand font isn’t in the list”Solutions:
- Only faces installed on the renderer are offered. Upload a
.woff2file on the Images tab to use your own. See Adding Images and Managing Assets. - Do not expect a substitute to be flagged at render time — that is exactly why unavailable faces are left out of the list.
I can’t put a logo in the header
Section titled “I can’t put a logo in the header”The band says “No images in this template’s library yet — upload one on the Images tab to put a logo in a band.”
Solutions:
- Upload the logo on the Images tab first. Bands can only use pictures that are already in the library.
- Set the band’s Layout to Designed — the simple three-cell layout takes text only.
My decoration doesn’t reach the edge of the page
Section titled “My decoration doesn’t reach the edge of the page”Solutions:
- Set it to Side to side to run it off the left and right edges.
- For ink on all four edges, use a full-bleed Cover page instead. A decoration never reaches the top and bottom of the paper.
Body text prints over my header
Section titled “Body text prints over my header”Solutions:
- It should not — the margin grows to reserve the band’s height automatically. Check Preview PDF rather than the canvas, which is where the real render can be seen.
- If the band has grown taller than you meant, look for a box in it whose lower edge sits further down than the rest; the band is as tall as its lowest box.
Related Articles
Section titled “Related Articles”- Designing a Template — Pages, flowing sections and the boxes you place on them
- Adding Images and Managing Assets — Uploading logos, brand fonts and artwork
- Previewing and Publishing a Template — Seeing the real render before anyone else does
- Getting Started with Presentation Template Builder — Creating, renaming and archiving templates