
Administering Inventory
This article is for Inventory administrators. It follows the Inventory Settings hub in the order the hub itself lays out, because each stage depends on the one before it. For everyday use — finding items, checking them out, scanning labels — see Tracking Assets with Inventory.
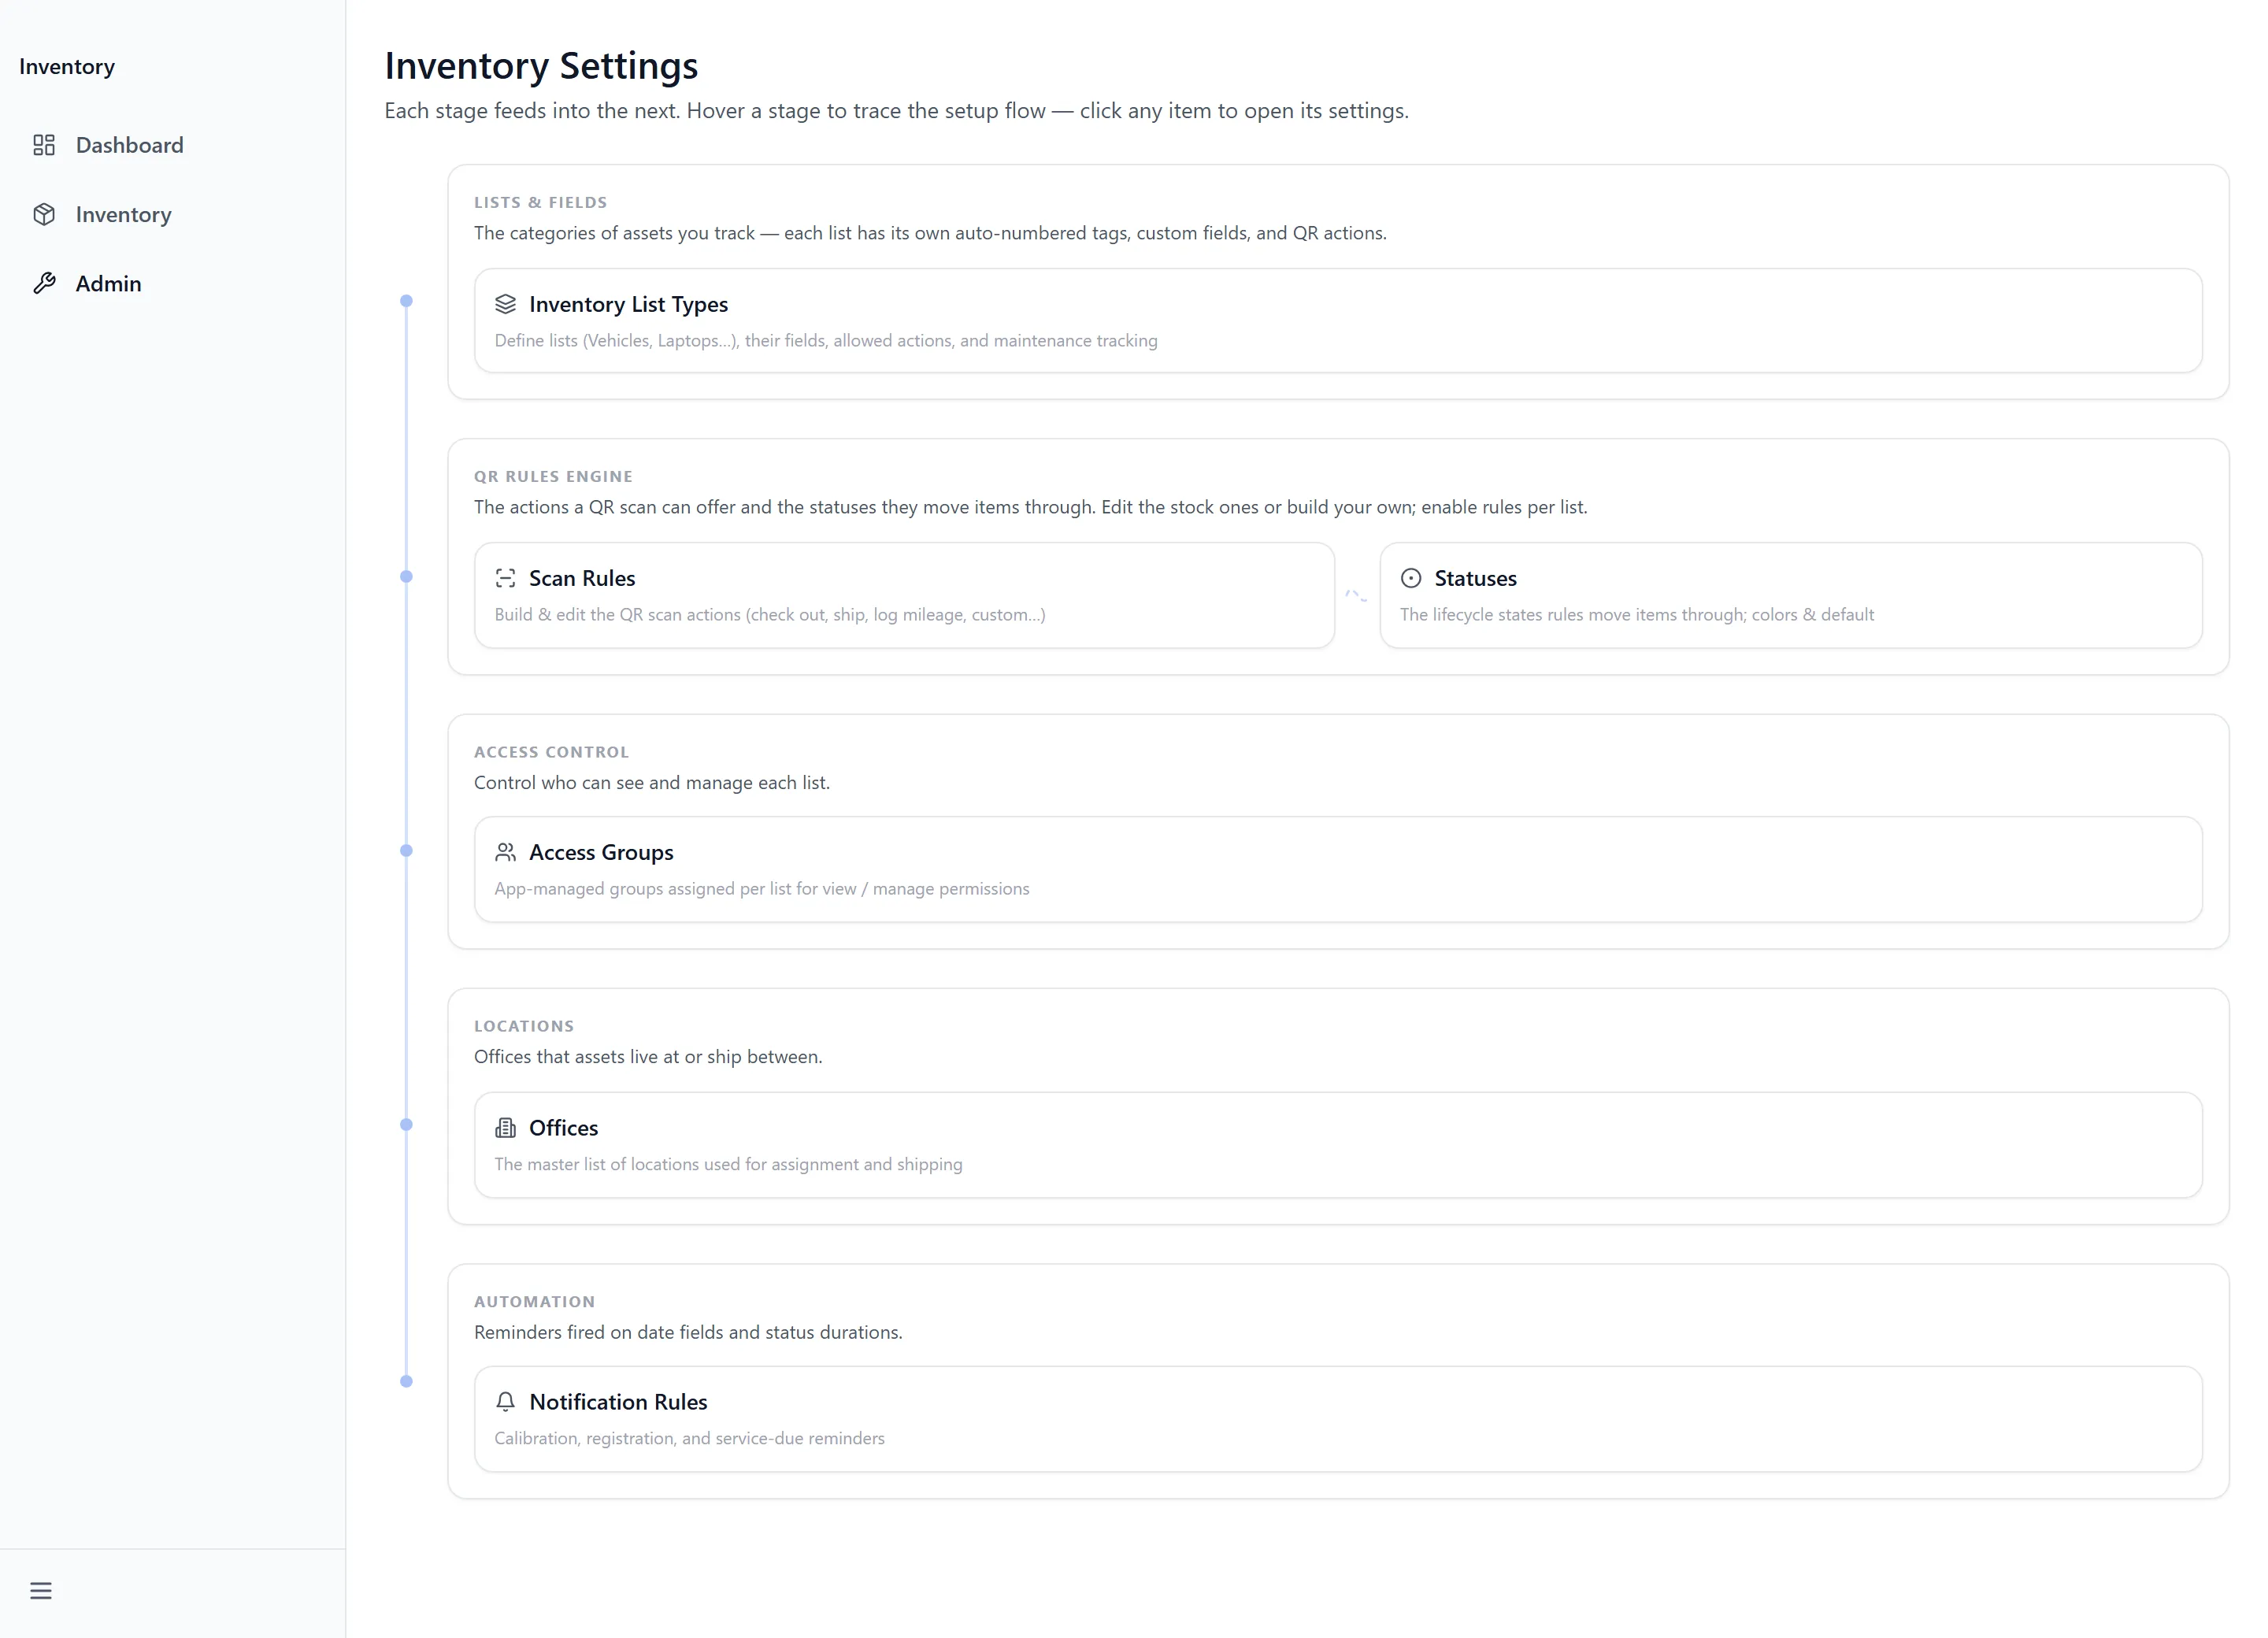
The Settings Hub
Section titled “The Settings Hub”Open Admin. Inventory Settings explains itself as “Each stage feeds into the next”, and it is worth taking literally — configuring these out of order produces lists with no actions on them.
| Stage | What it covers |
|---|---|
| LISTS & FIELDS | “The categories of assets you track — each list has its own auto-numbered tags, custom fields, and QR actions.” |
| QR RULES ENGINE | “The actions a QR scan can offer and the statuses they move items through. Edit the stock ones or build your own; enable rules per list.” |
| ACCESS CONTROL | “Control who can see and manage each list.” |
| LOCATIONS | “Offices that assets live at or ship between.” |
| AUTOMATION | “Reminders fired on date fields and status durations.” |
Inventory List Types
Section titled “Inventory List Types”A list type is a category of asset — vehicles, laptops, gauges — and it decides what fields its items have, what actions they offer, and how they are numbered.
- Open Inventory List Types and select + New.
- Enter a Name and a Prefix. The prefix drives the asset number, so
VANproducesVAN-000001. - Optional: add a Description, and seed the fields from a template under Seed from template (optional) — Vehicle, Drone, IT Equipment or Field Equipment.
- Select Create Type.
Selecting an existing type opens four things to configure.
QR Scan Actions
Section titled “QR Scan Actions”Tick which actions this list offers. The panel explains: “Turn scan actions on/off for this list. Build or edit the actions themselves in Settings → Scan Rules.”
Access and Permissions
Section titled “Access and Permissions”Assign groups under Can view and Can manage (add/edit/act). With none assigned the list is “Open list — visible to everyone”; assign any and it becomes “Restricted list — only members of the selected groups (and admins) have access.” Managing implies viewing, so a user only needs to be in one of the two.
Maintenance and Mileage
Section titled “Maintenance and Mileage”Switching this on adds the Maintenance tab and, as the panel says, the mileage and service actions “are automatically added to scans and item actions for this list — no separate toggle needed.” That is why they are absent from the QR Scan Actions list.
Custom Fields
Section titled “Custom Fields”Each field has a name, a display label and a type, and four switches: Required, Show in list, Show on QR scan, and Drive notifications (date fields) — the last is what makes a date eligible for a reminder rule.
Scan Rules
Section titled “Scan Rules”Scan Rules is “The catalog of actions a QR scan can offer.” Edit the stock rules or build your own here, then switch them on for each list under its QR Scan Actions.
Each rule has:
- A Button Label and icon
- Show on statuses — which statuses the action appears for. “None selected = all statuses.”
- Behaviour — the status to move the item to, and whether it logs a maintenance record
- Fields to collect — what the person scanning is asked for, and where each answer is stored
Stock rules are marked “built-in — behaviour is coded”. They can be relabelled and re-scoped but not deleted — the button offers Disable instead.
Statuses
Section titled “Statuses”Statuses are “The lifecycle states an item can be in”, and scan rules reference them both to decide when an action shows and to set where it lands. Each has a label, a badge tone and a colour, plus two switches: Default for new items and Terminal (marks item inactive).
As with rules, system statuses can be disabled but not deleted.
Access Groups
Section titled “Access Groups”Groups here are managed inside Inventory rather than centrally, and exist to be assigned per list. Create a group, search the directory to add members, then assign it under a list type’s Can view or Can manage.
Offices
Section titled “Offices”Offices is “The master list of locations used for assignment and shipping”. Each has a name, city, state and address. Every office an item can live at or ship to has to exist here first — the desktop shipping form picks from this list.
Notification Rules
Section titled “Notification Rules”Rules fire reminders on dates — calibration, registration, service due. Each names the list type it applies to (or all of them), the field it watches, and how many days ahead to fire. Reminders are checked once a day.
A field only appears here if it is a date field with Drive notifications (date fields) switched on in the list type.
Troubleshooting
Section titled “Troubleshooting”Items show no actions at all
Section titled “Items show no actions at all”Solutions:
- The stock catalogues have not been loaded. Open Scan Rules → Load stock rules and Statuses → Load stock statuses.
- With rules loaded, check they are ticked under the list type’s QR Scan Actions — loading them does not enable them.
Log Mileage and Log Service aren’t in the actions list
Section titled “Log Mileage and Log Service aren’t in the actions list”Solutions:
- They are not meant to be. Switch on Maintenance & Mileage for the list type and both are added automatically.
Someone can’t see a list
Section titled “Someone can’t see a list”Solutions:
- Check whether the list has any groups assigned. Assigning even one makes it restricted to those groups.
- Confirm the person is a member of a group under Can view or Can manage.
- Someone with view access but not manage access sees the list and its items but no New Item button and no actions.
A field isn’t showing on the scan page
Section titled “A field isn’t showing on the scan page”Solutions:
- Switch on Show on QR scan for that field in the list type.
A reminder never arrived
Section titled “A reminder never arrived”Solutions:
- Confirm the field is a date field with Drive notifications (date fields) switched on — a rule cannot watch a field that is not eligible.
- Check the rule is Active and points at the right list type.
- Reminders are checked once a day, so a rule added today fires from tomorrow.
I can’t delete a status or a scan rule
Section titled “I can’t delete a status or a scan rule”Solutions:
- Stock and system entries can only be disabled. Disabling takes them out of use everywhere without breaking the history of items that used them.
Related Articles
Section titled “Related Articles”- Tracking Assets with Inventory — The everyday side, and the reference for what each stock action does
- Getting Access to Apps and Extensions — How access to the app itself is granted